Welcome back! I’m in the middle of installing NSX-T in my vSphere lab environment. In part one I installed NSX Manager, in part two I deployed the NSX Controller Cluster. Now it’s time start working on what it’s all about: The data plane.
High-level overview
Setting up a complete NSX-T data plane involves installing and configuring several components. We have East-West distributed routing, North-South centralized routing, and security. Then there are the additional services like load balancing, NAT, DHCP and partner integrations.
The order in which you set things up depends primarily on what you’re trying to achieve. I noticed that different documents and guides also use different approaches.
So, I put together bits and pieces from different sources and came up with the following high-level plan for my NSX-T data plane deployment:
- Prepare the vSphere distributed switch
- Configure transport zones
- Create logical switches
- Prepare & configure ESXi hosts
- Deploy & configure Edge VMs
- Configure routing
In this article I will prepare the distributed switch, add the transport zones, and create the logical switches for the uplinks. Just to keep things digistible 🙂
Preparing the vSphere Distributed Switch
The NSX Edge VMs, that will be deployed later on, connect to four different VLANs: management, transport (carrying logical networks), and two uplink VLANs.
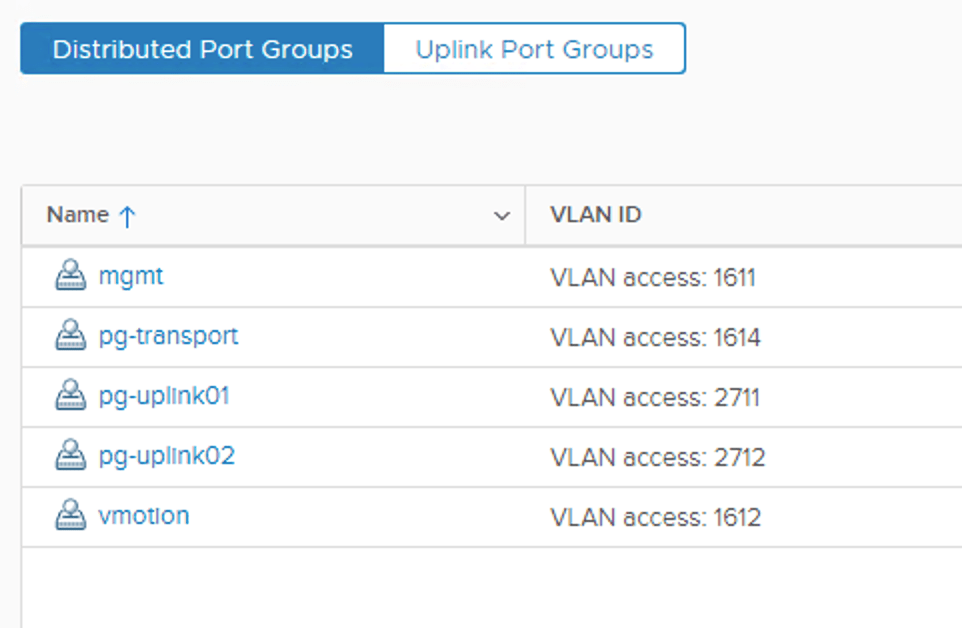
I already have a distributed port group that maps to the management VLAN, so I need to create the ones for transport and the uplinks.
In vCenter, navigate to Networking, right-click the distributed switch and select Distributed Port Group > New Distributed Port Group.
I’m calling this port group “pg-transport”.
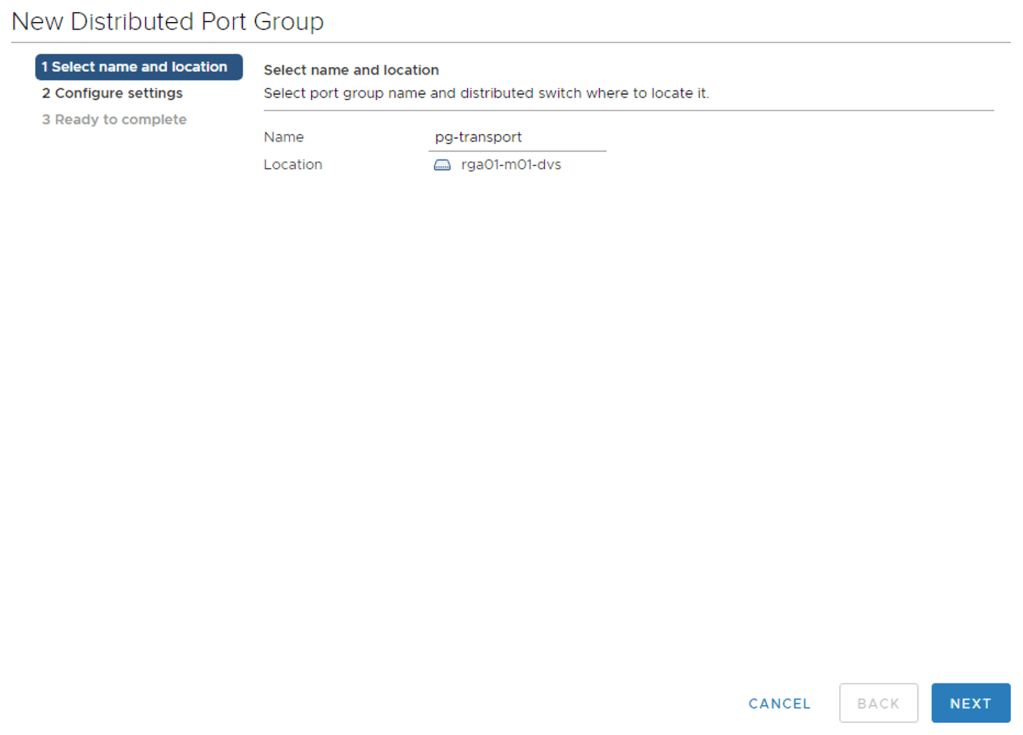
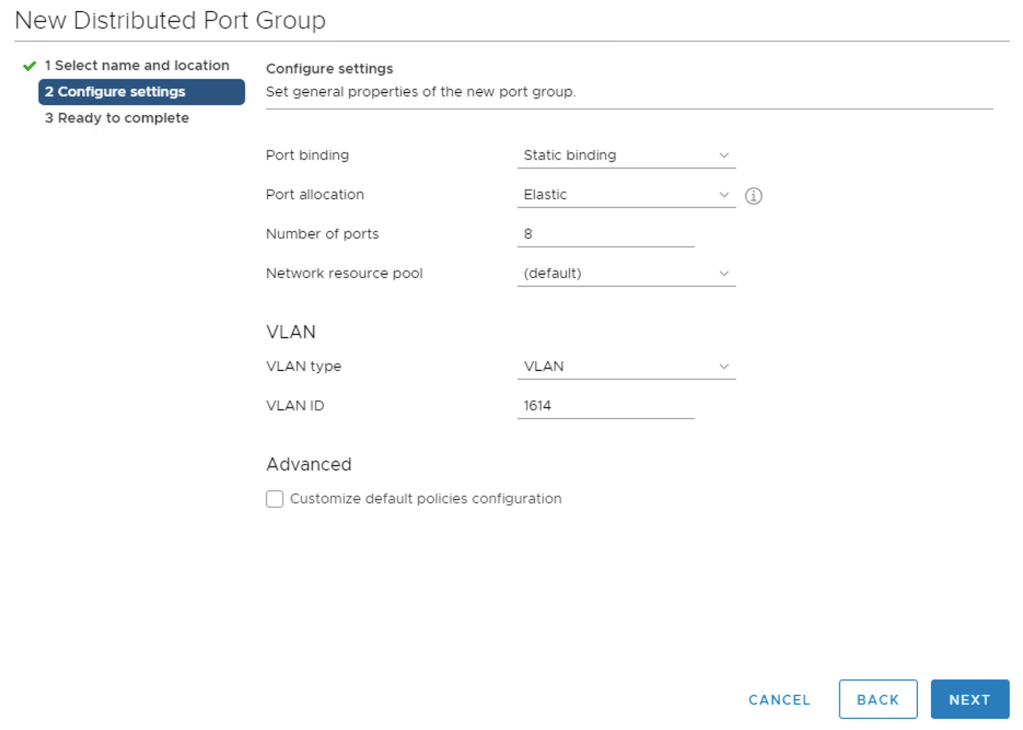
On the next page I set “VLAN type” to “VLAN” and “VLAN ID” to “1614”. Click “Next” and finish the port group creation.
I repeat this process for the two port groups for the uplinks (VLAN 2711 and 2712). Once done it looks like this:
And the ESXi host’s network configuration now looks something like this:

Here I have the VDS with its 5 port groups as well as a pair of unused NICs which I will use for NSX networking later on.
Configuring NSX transport zones
Transport zones in NSX are containers that define the reach of the transport nodes. I briefly mentioned transports nodes in part two. Transport nodes are the hypervisor hosts and NSX Edges that participate in an NSX overlay. For hypervisor hosts, this means that its VMs can communicate over NSX logical switches. For NSX Edges, this means it will have logical router uplinks and downlinks.
My lab environment will start out with three transport zones: uplink01, uplink02, and overlay01.
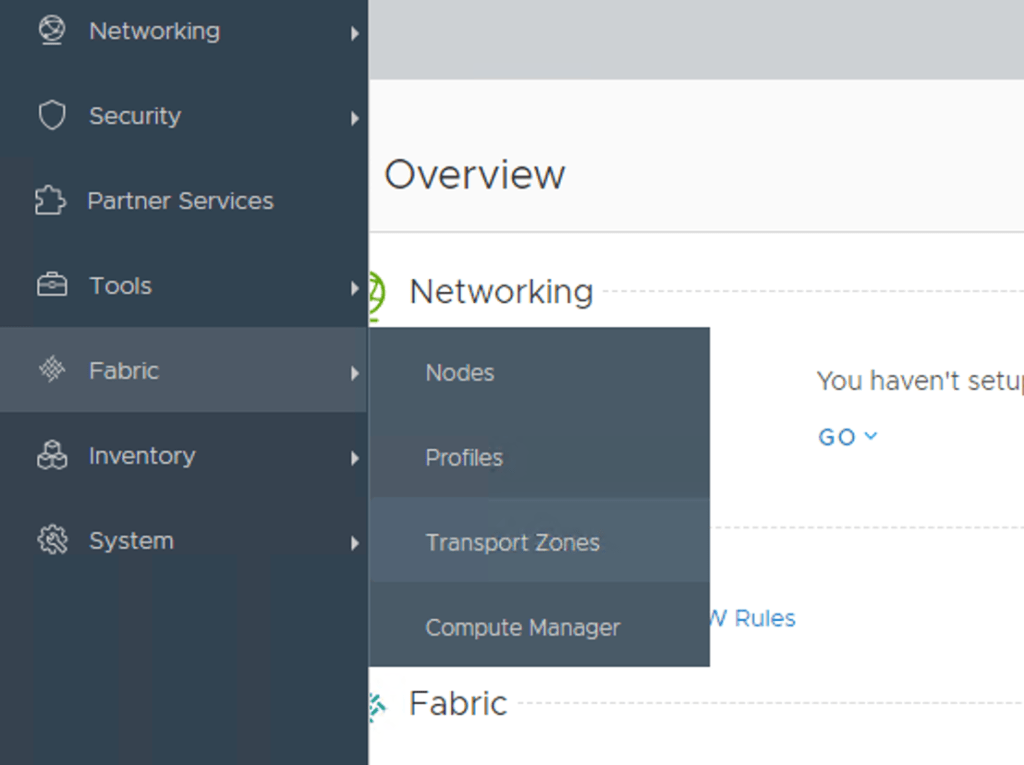
Log in to NSX Manager. In the menu at the left select Fabric > Transport Zones.
I start by creating a transport zone called “uplink01”. This is a VLAN transport zone that will be used by the NSX Edge later on:

I’m repeating this process to create the “uplink02” VLAN transport zone.
The third transport zone is an Overlay transport zone. It will be used by the host transport nodes and the NSX Edge:

The three transport zones listed:

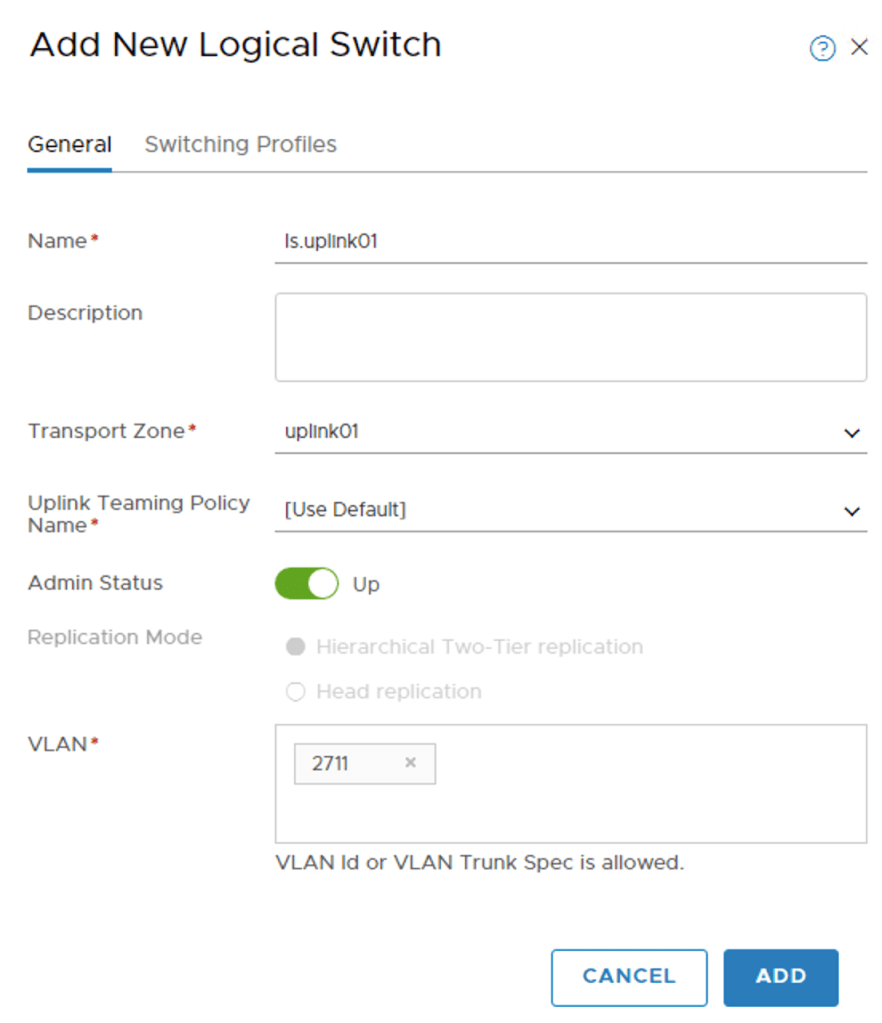
Creating logical switches
Next I’ll create two logical switches. These two will facilitate the transit between NSX and the pfSense router. In NSX Manager choose Networking > Switching.

The first logical switch, “ls-uplink01”, I add to transport zone “uplink01” and configured with VLAN 2711 :
I repeat this process to create a second logical switch called “ls-uplink02”. I add it to transport zone “uplink02” and configure it with VLAN Id 2712.

Conclusion
Taking small steps, but getting there. I created the necessary port groups on the vSphere distributed switch which are needed for the Edge VMs. I then went on to create the transport zones as well as two logical switches from NSX Manager.
In the next part I will continue with setting up the transport nodes; The ESXi hosts and the NSX Edge.

Leave a comment