
Welcome back! I’m still busy installing NSX-T in my lab. I prepared the vSphere distributed switch, configured the NSX transport zones, and created the transit logical switches in part three. I will now continue with setting up the NSX transport nodes.
Hypervisor transport nodes
I’ll start with turning my ESXi hosts into NSX transport nodes. In part one I added my vCenter system to NSX Manager where it is called a “Compute Manager”. This connection between NSX Manager and vCenter comes in handy when deploying and configuring certain components of the NSX solution. This is definitely the case when preparing ESXi hosts.
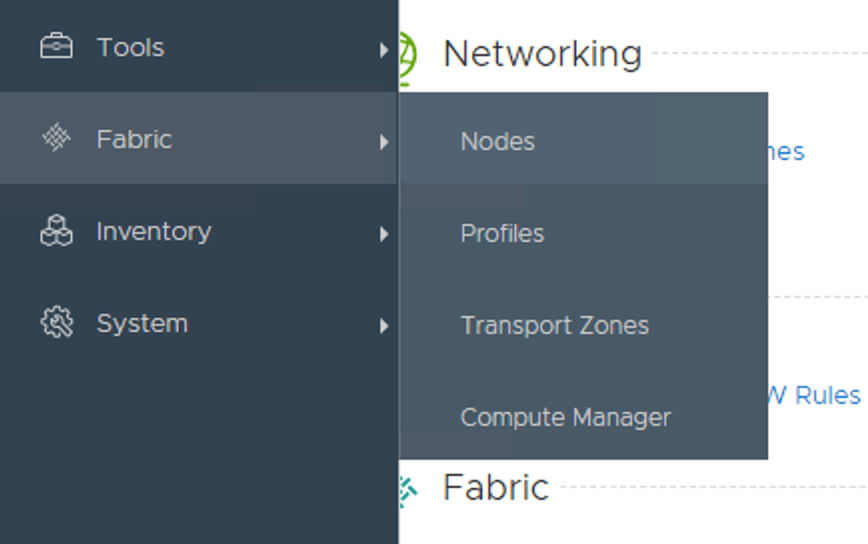
In NSX Manager I navigate to Fabric > Nodes:
Under the first tab “Hosts” I change the “Managed by” to my compute manager (my vCenter):

Once the compute manager is selected it shows the vSphere cluster and, when expanded, the ESXi hosts:

There are two ways I can go about installing NSX on my ESXi hosts. Either I install the VIBS on individual hosts, or I configure the installation on the cluster level. In my lab I’m going for the latter and click the “Configure Cluster” button.
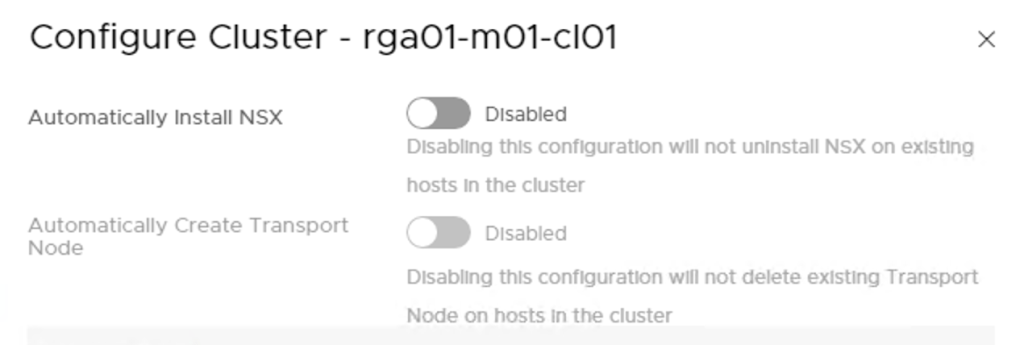
Here I enable automatic installation of NSX which will automatically install the NSX VIBS to all ESXi hosts in the cluster.
Managing installation on the cluster level allows for automatic creation of transport nodes as well. I’m a huge fan of automating so I enable this one too:

Some input is required here:
- Transport Zone – my ESXi transport nodes participate in overlay networking so here I pick the “overlay01” transport zone.
- Uplink Profile – A template for the ESXi hosts uplinks. I create a new uplink profile that matches my lab environment called “Overlay-Uplink-Profile”. I change the teaming policy to “Load balance source” and type “uplink-1,uplink2” under “Active Uplinks”. Finally I change the “Transport VLAN” to “1614”.
- IP Assignment – Transport nodes doing overlay networking use tunnel endpoints (TEPs) where L2 frames are encapsulated and transported over L3 to other TEPs. TEPs need an IP address and it is here one configures how IP addresses should be assigned to the TEPs. I create an IP Pool called “tep-pool” with a range of “172.16.14.50 – 172.16.14.70” and CIDR “172.16.14.0/24” which is the IP subnet assigned to the transport VLAN (1614) in my lab environment.
- Physical NICs – Here I specify the ESXi host’s physical NICs that will be used for NSX networking. In my environment the ESXi hosts have dedicated NICS for NSX networking. These are “vmnic2” which I map to “uplink-1” and “vmnic3” which I map to “uplink-2”.
Below a screen when all information is entered:

Once I click the “Add” button the NSX installation kicks off immediately:

After a minute or so things are looking pretty good:

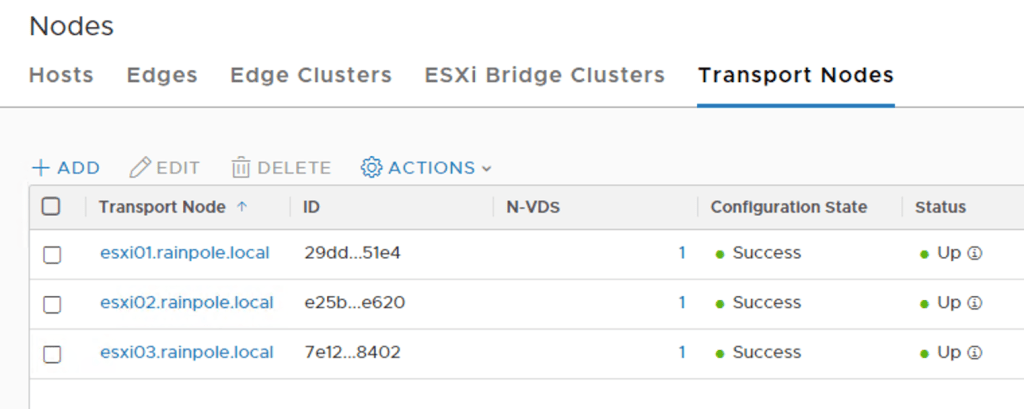
Under the “Transport Nodes” tab I see that the three ESXi hosts have been successfully configured as transport nodes:
Edge transport nodes
With the ESXi hosts prepared I’m moving on with the Edge. As the name implies the NSX Edge is where NSX meets the physical network. In my lab I’m going to deploy two Edge VMs.
I start by adding the following DNS records to DNS:
- edge-01 – 172.16.11.58
- edge-02 – 172.16.11.59
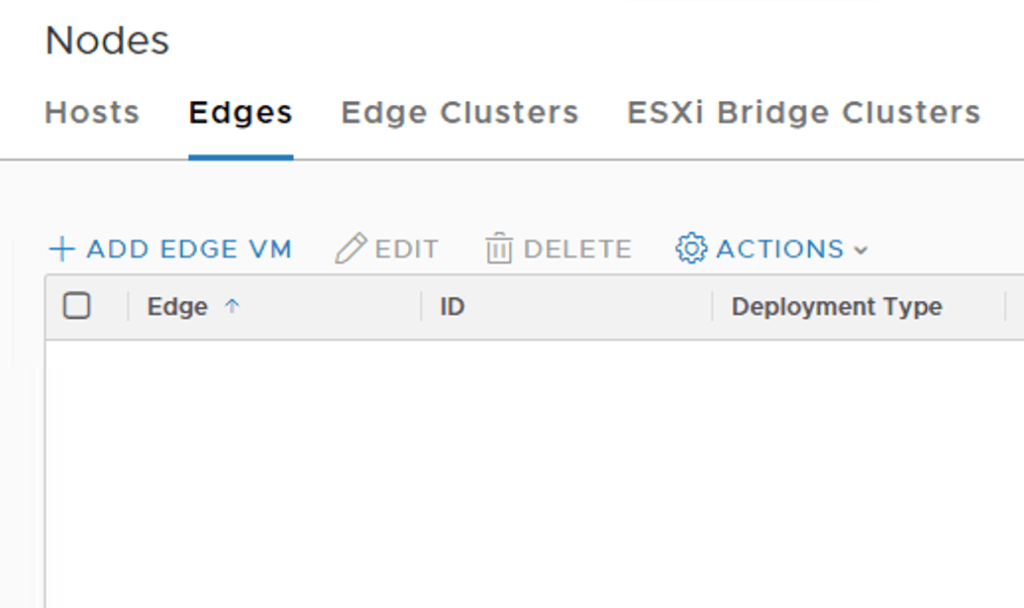
Next, in NSX Manager I navigate to Fabric > Nodes and click on the “Edges” tab:
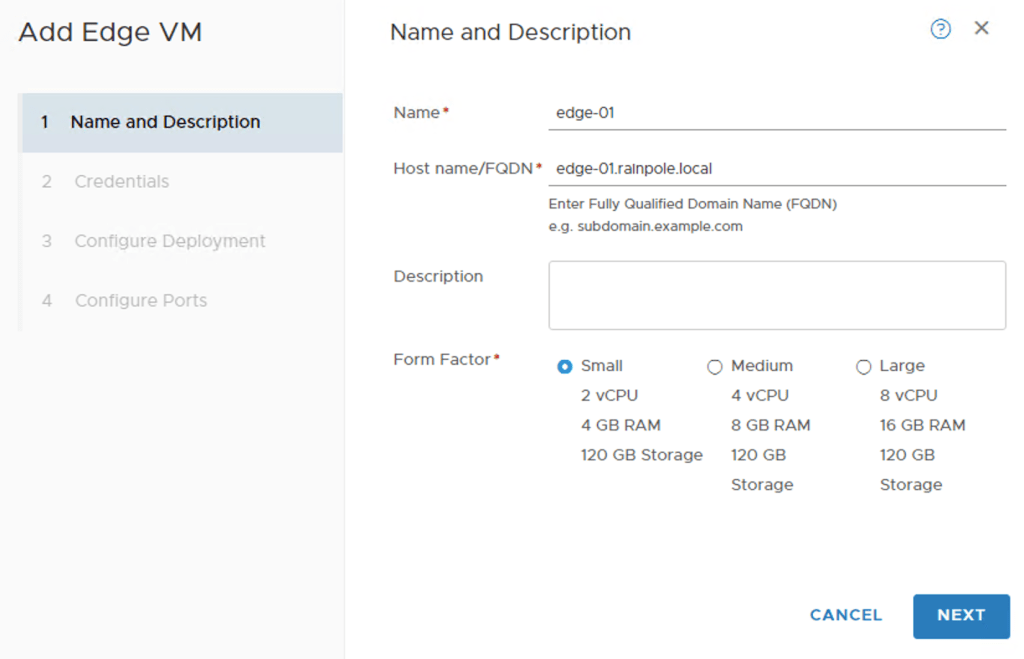
Here I click in the “+Add Edge VM” button. I fill out name and FQDN and choose to deploy a small Edge VM:
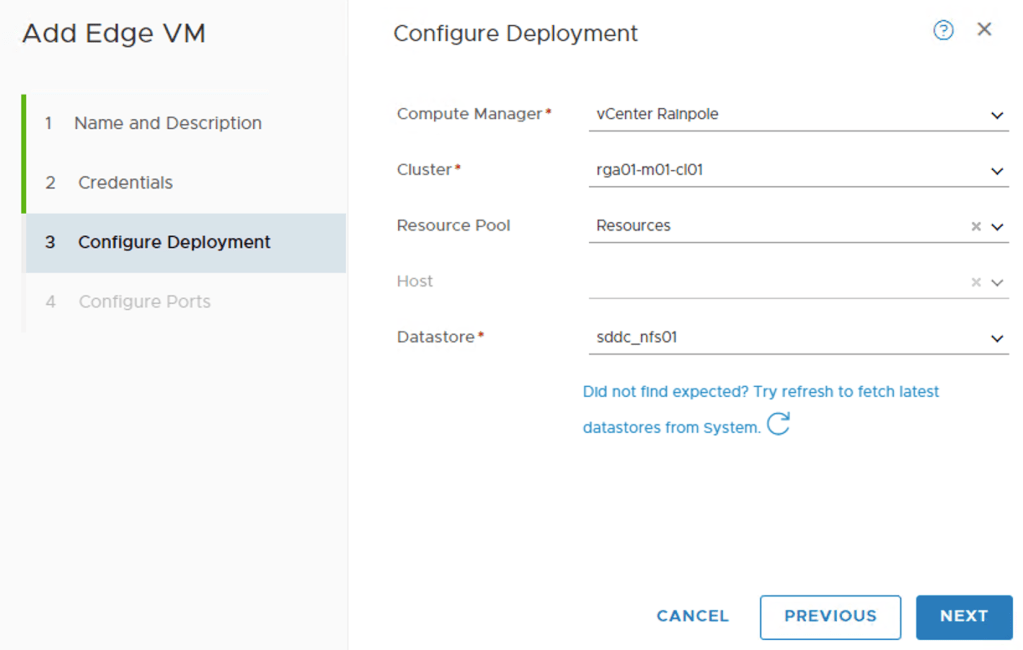
After clicking “Next” I need to specify some information about the vSphere environment where this Edge VM will be hosted. After I choose my compute manager I can pick the objects for cluster, resource pool, and datastore from the drop-down lists:
On the next page configure the network settings for the Edge VM:
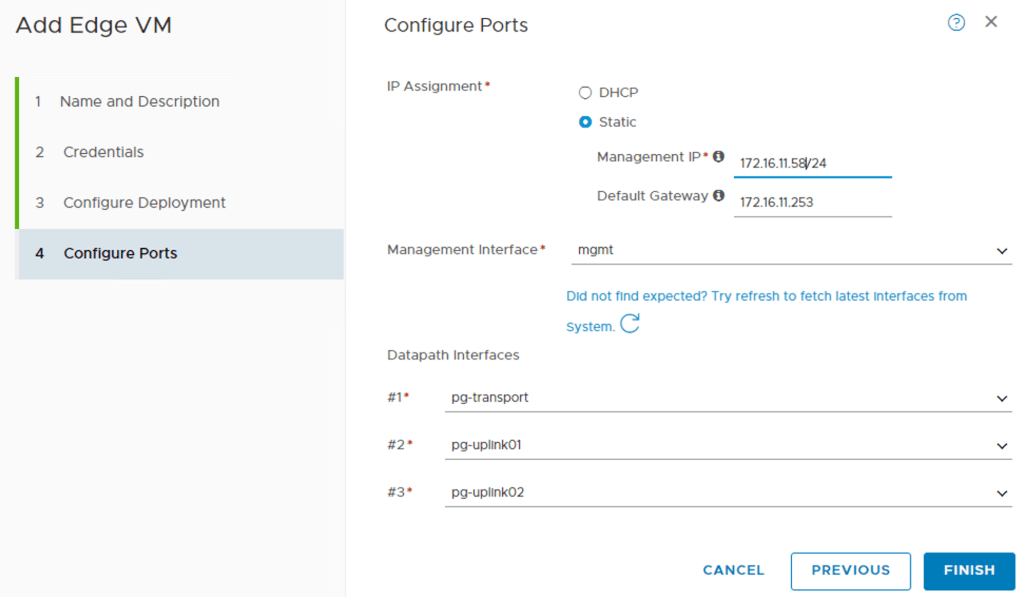
First I specify the IP address, gateway, and port group for the Edge VM’s management interface. Then I configure the three so called “datapath” interfaces. These are the Edge VM’s interfaces that will be part of the data plane. I’m assigning interface #1 to the “pg-transport” port group, interface #2 to the “pg-uplink01” port group, and interface #3 to the “pg-uplink02” port group.
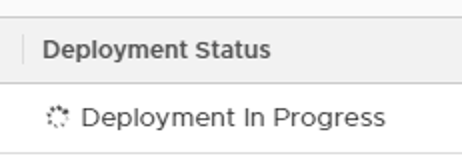
When I click “Finish” NSX Manager starts deploying the Edge VM right away.
Having a look in vCenter shows me the new Edge virtual machine:
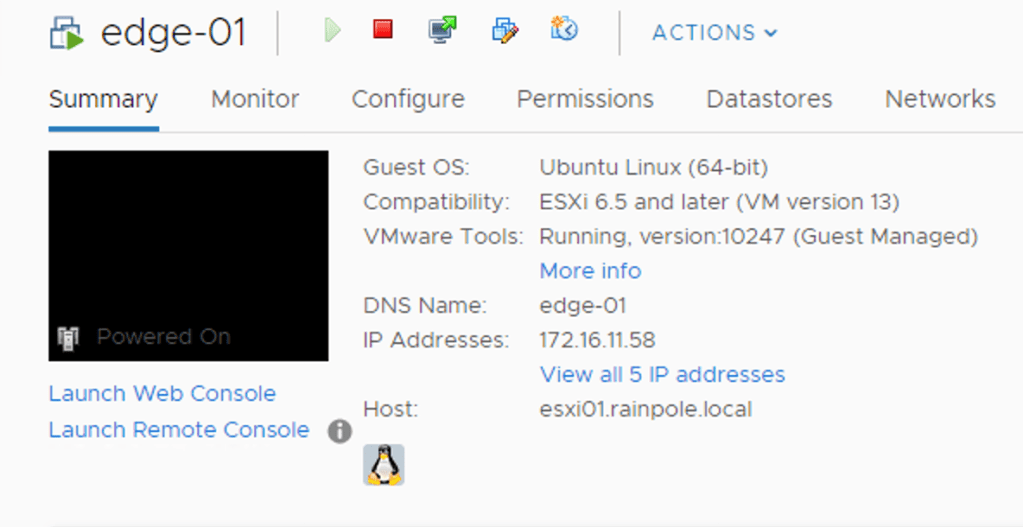
After a couple of minutes the Edge VM deployment is completed and has the following status:

The manager connectivity is up and running which is good. I still need to configure this Edge VM as a transport node before it can participate in actual NSX networking.
Before doing that I will deploy the second Edge VM. I basically repeat the steps above assigning IP address 172.16.11.59/24 to the management interface instead. Here are the two Edge VMs listed:

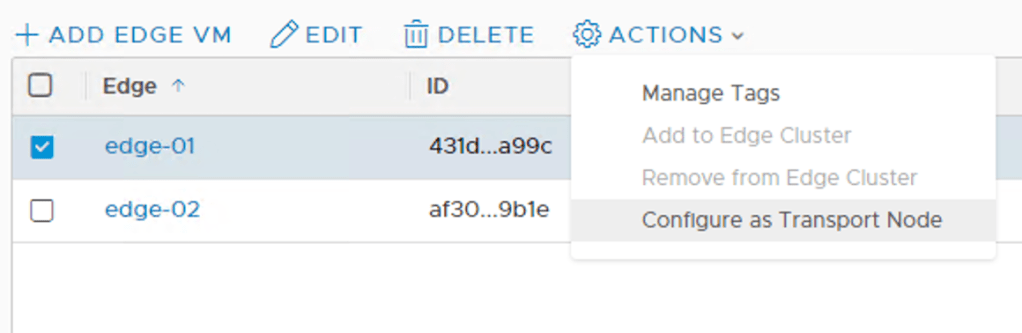
Now let’s configure them as transport nodes.
I select edge-01, click the “Actions” button, and choose “Configure as Transport Node”:
On the “General” screen I type a name for this transport node (tn-edge-01) and select the transport zones the Edge VM will be part of: overlay01, uplink01, and uplink02:
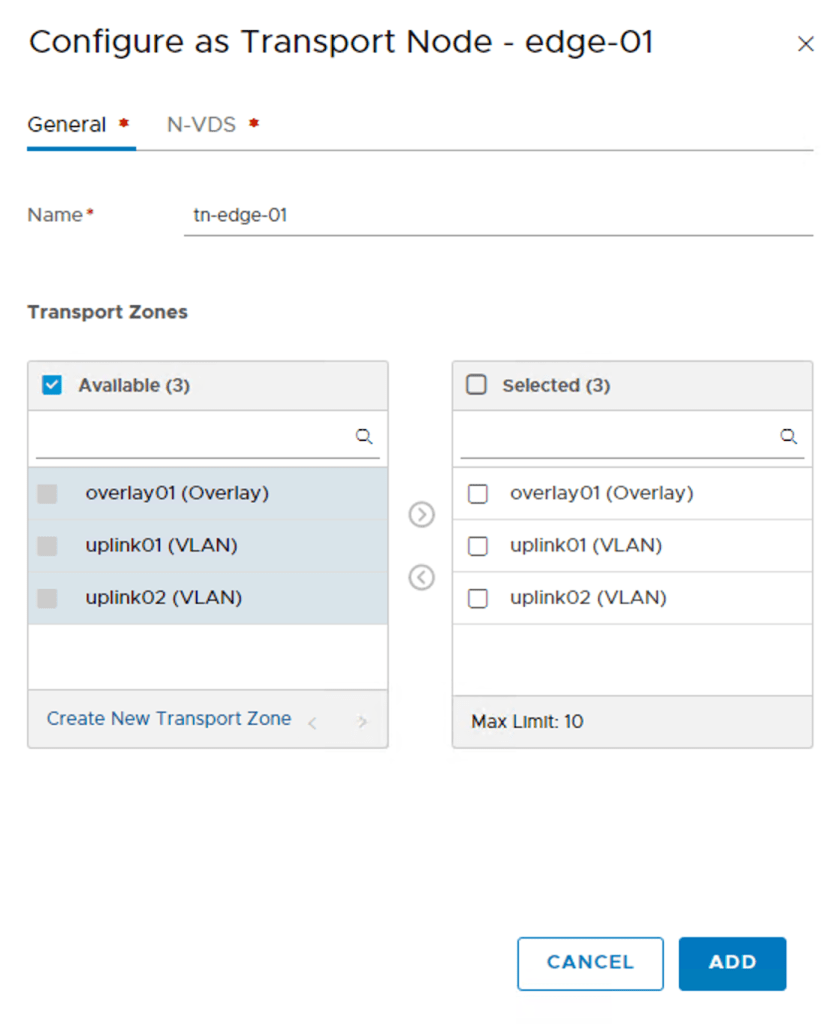
On the “N-VDS” tab I need to create an N-VDS for each of the selected transport zones.
I click on the “+ Add N-VDS” button and star configuring the first N-VDS “overlay01”:
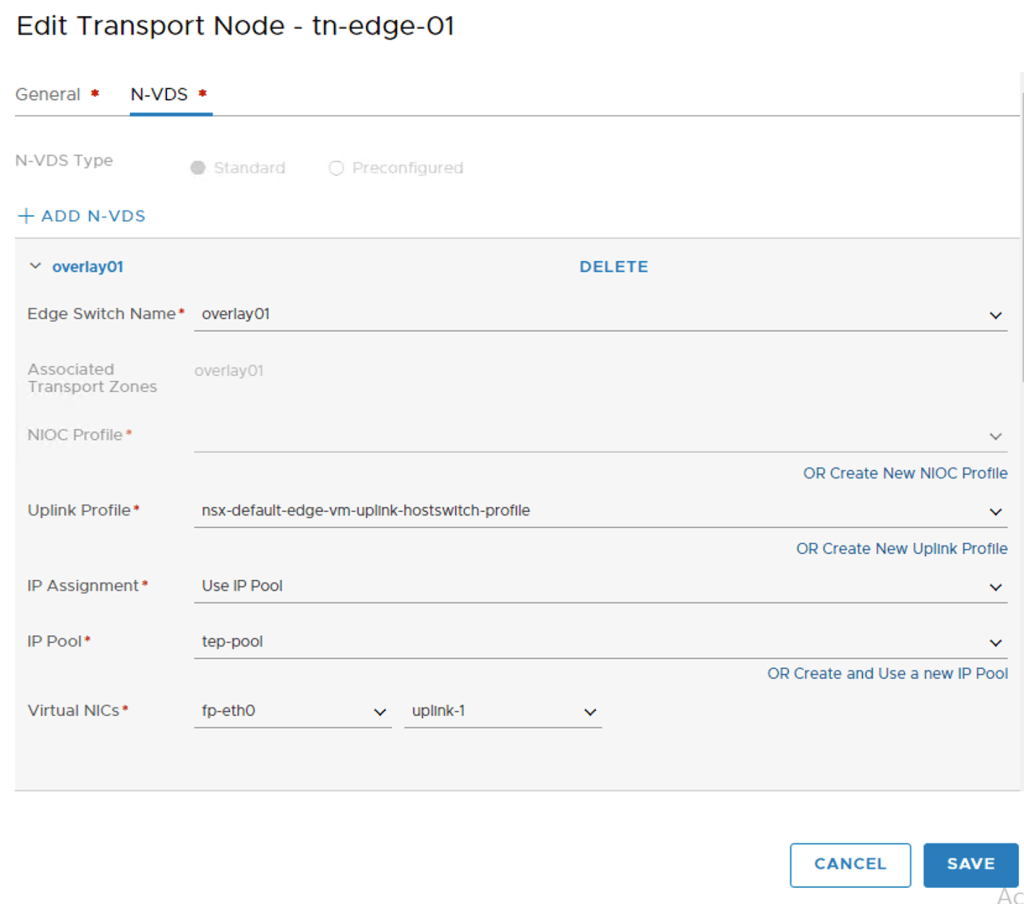
I’m using the “nsx-default-edge-vm-uplink-hostswitch-profile” and the “tep-pool” IP pool to assign an IP address to the TEPs. Datapath virtual NIC “fp-eth0” is mapped to “uplink-1”.
I click the “+ Add N-VDS” once more to create the second N-VDS called “uplink01”:
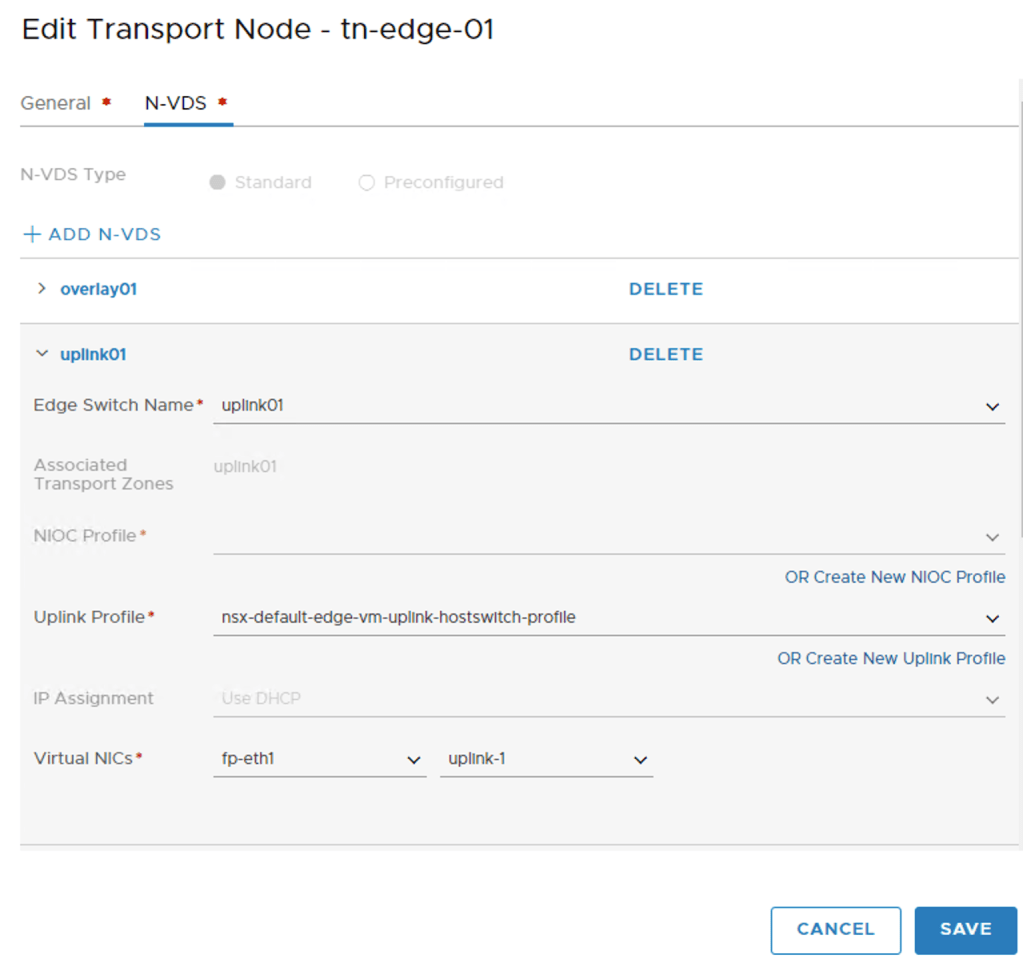
I choose “uplink01” as the switch name and map “fp-eth1” to “uplink-1” .
I click the “+ Add N-VDS” a third time to add the last N-VDS called “uplink02”:
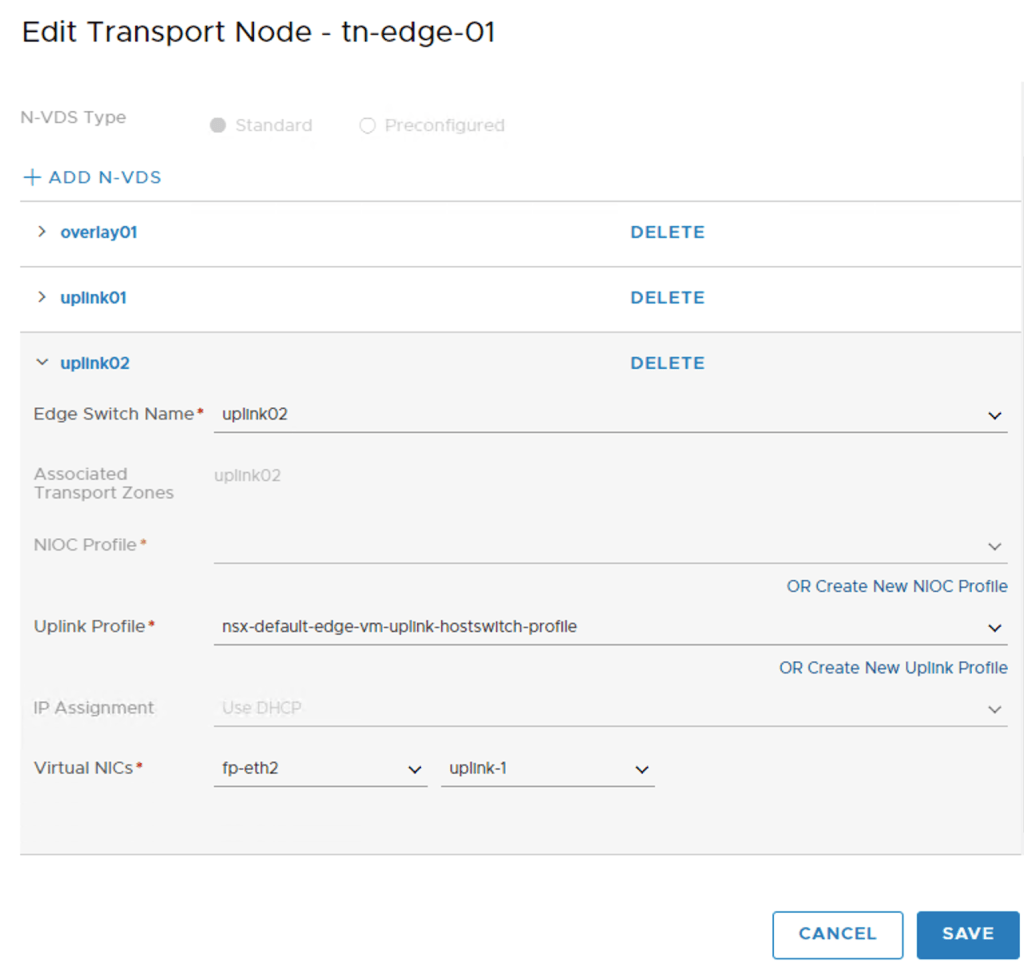
I choose “uplink02” as the switch name and map “fp-eth2” to “uplink-1” .
With the three N-VDS’s configured I click the “Save” button and the Edge VM is configured as a transport node.
I repeat the above steps to configure the second edge “edge-02” as transport node “tn-edge-02”.
Both Edge VMs are now configured as transport nodes. Looking under Fabric > Nodes > Edges I can see that a connection with the controller cluster has been established and that each Edge vm has a transport node associated:

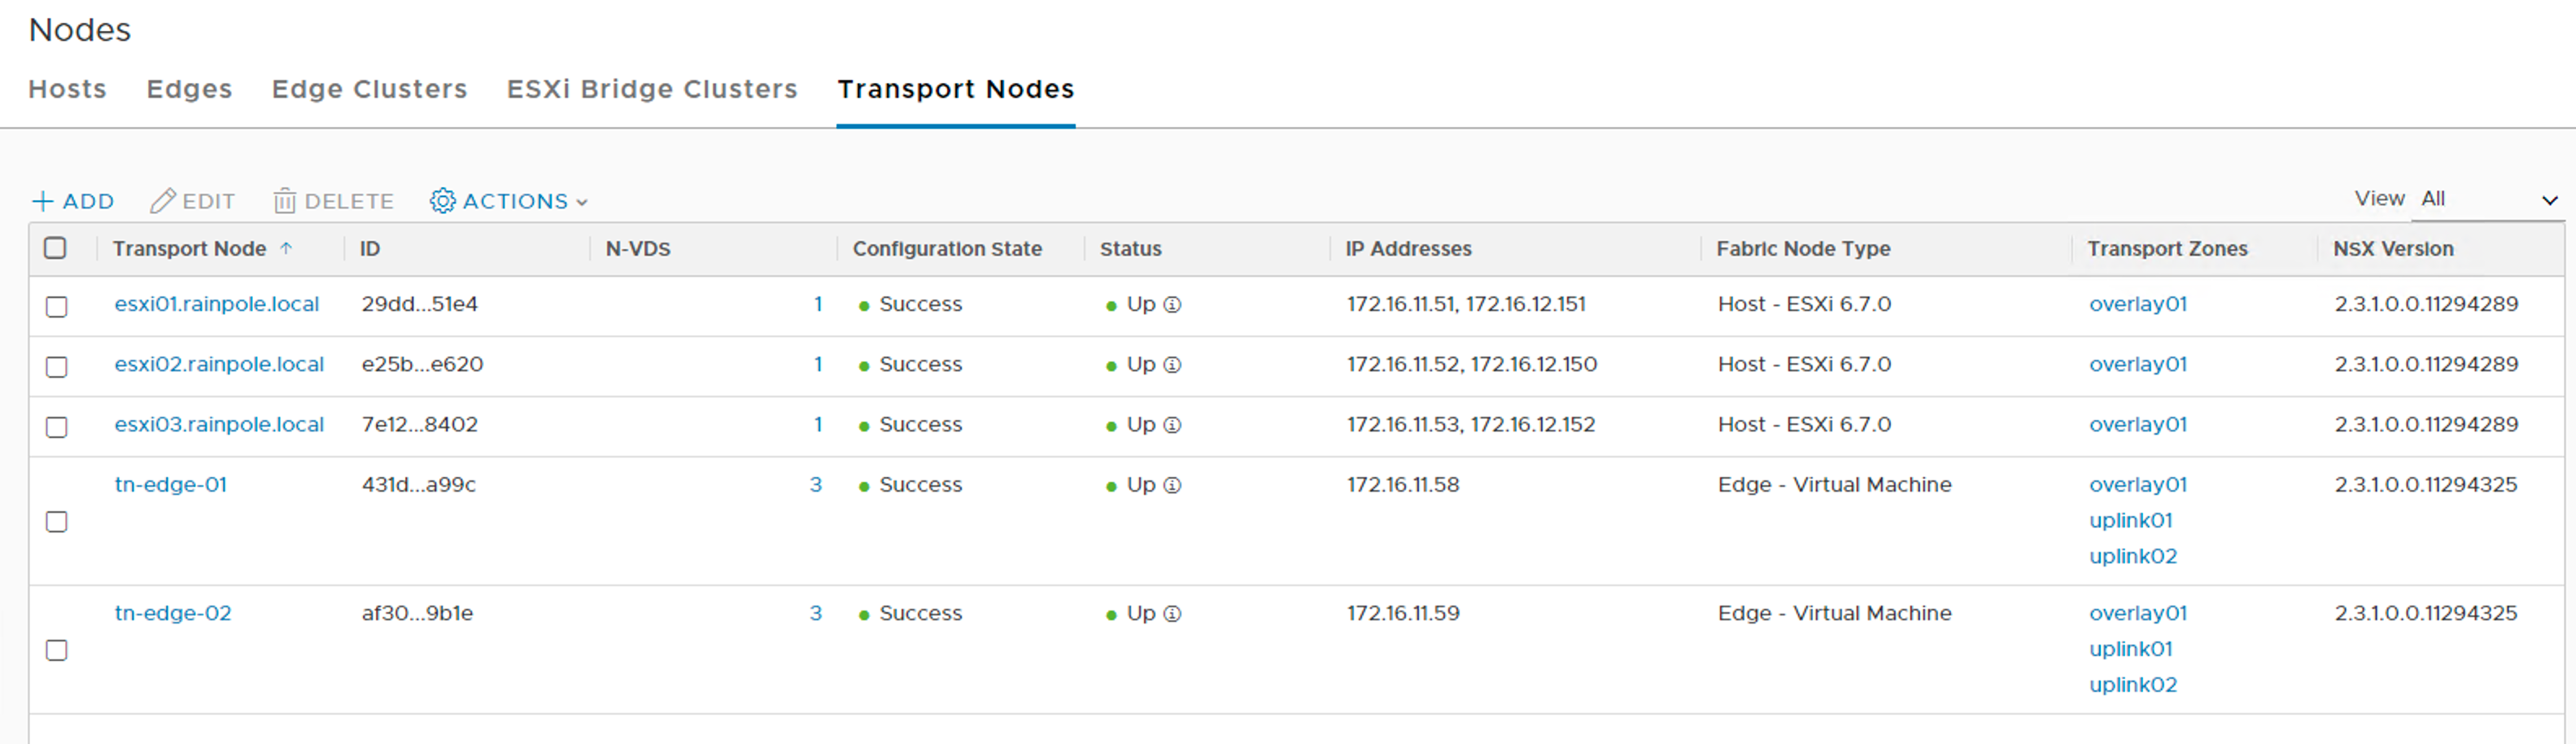
Looking under Fabric > Nodes > Transport Nodes I see five transport nodes. Three ESXi hosts and two Edge VMs:
There is one last thing I need to do and that is create an Edge Cluster. This is done under Fabric > Nodes > Edge Clusters.

I’m clicking the “+Add” button to start creating the Edge Cluster:

I add both of the edge transport nodes to “edge-cluster”. I click the “Add” button to finish the cluster creation. Edge cluster in place!
Conclusion
That was quite a bit of work, but now all the transport nodes are configured and everything should be in place to start doing some serious NSX networking. We’ll have a look at that in the next part. Until then, take care!

Leave a comment