
Learning by doing is my preferred method of getting to know a product or technology I haven’t worked with before.

Take NSX-T for example. On the surface NSX-T seems to be just another flavour of network virtualisation technology by VMware. But having a closer look I quickly realised NSX-T is quite a different beast compared to NSX-V.
So, in order to learn more about the product I’m going to install NSX-T in a lab environment. In the coming blog posts you can follow along as I’m setting this up.
In this first part I’ll quickly introduce my lab environment and then continue with the deployment of the management plane main component: NSX Manager.
Lab environment
My small NSX-T lab will use the following components:
- pfSense router with OpenBGPD package
- Windows Server 2016 (AD/DNS)
- NetApp NFS storage
- vCenter 6.7
- ESXi 6.7
- NSX-T 2.3
The blog post series is about setting up NSX-T so I deployed some things in advance. A pfSense router, vCenter, three ESXi hosts in a cluster, and a Windows AD/DNS server have been installed and configured.
Here is a simple diagram of the environment the way it looks right now.

The ESXi hosts are equipped with four NICs. Two of them are used by vSphere and the other two are unassigned and will be used by NSX-T networking.
I configured some VLANs on the pfSense router which are trunked down to the ESXi hosts. The pfSense router has the OpenBGPD package installed so that I can do some dynamic routing later on.
I left out the details of the non-nested infrastructure. The three ESXi hosts are nested (running as VMs). vCenter, the Windows server, and pfSense are running outside of the nested environment.
Networking
I configured the following networks:
| VLAN ID | VLAN Function | CIDR | Gateway |
| 1611 | Management | 172.16.11.0/24 | 172.16.11.253 |
| 1612 | vMotion | 172.16.12.0/24 | 172.16.12.253 |
| 1614 | Transport | 172.16.14.0/24 | 172.16.12.253 |
| 2711 | Uplink01 | 172.27.11.0/24 | 172.27.11.1 |
| 2712 | Uplink02 | 172.27.12.0/24 | 172.27.12.1 |
Yes, /24 subnets all the way. This is a lab environment so I don’t really have to worry about wasting IP addresses. In a production environment I would most likely be using smaller subnets.
DNS and hostnames
I’m using the “rainpole.local” DNS domain name for this lab and created the following DNS records in advance:
| Name | IP address |
| dc01-0 | 172.16.11.10 |
| esxi01 | 172.16.11.51 |
| esxi02 | 172.16.11.52 |
| esxi03 | 172.16.11.53 |
| vcenter | 172.16.11.50 |
| ntp | 172.16.11.10 |
| nsxmanager | 172.16.11.56 |
More DNS records will probably be added during the deployment.
Installing NSX Manager
The first thing I need to do is install NSX Manager. For vSphere the NSX Manager installation is done by deploying an OVA package.
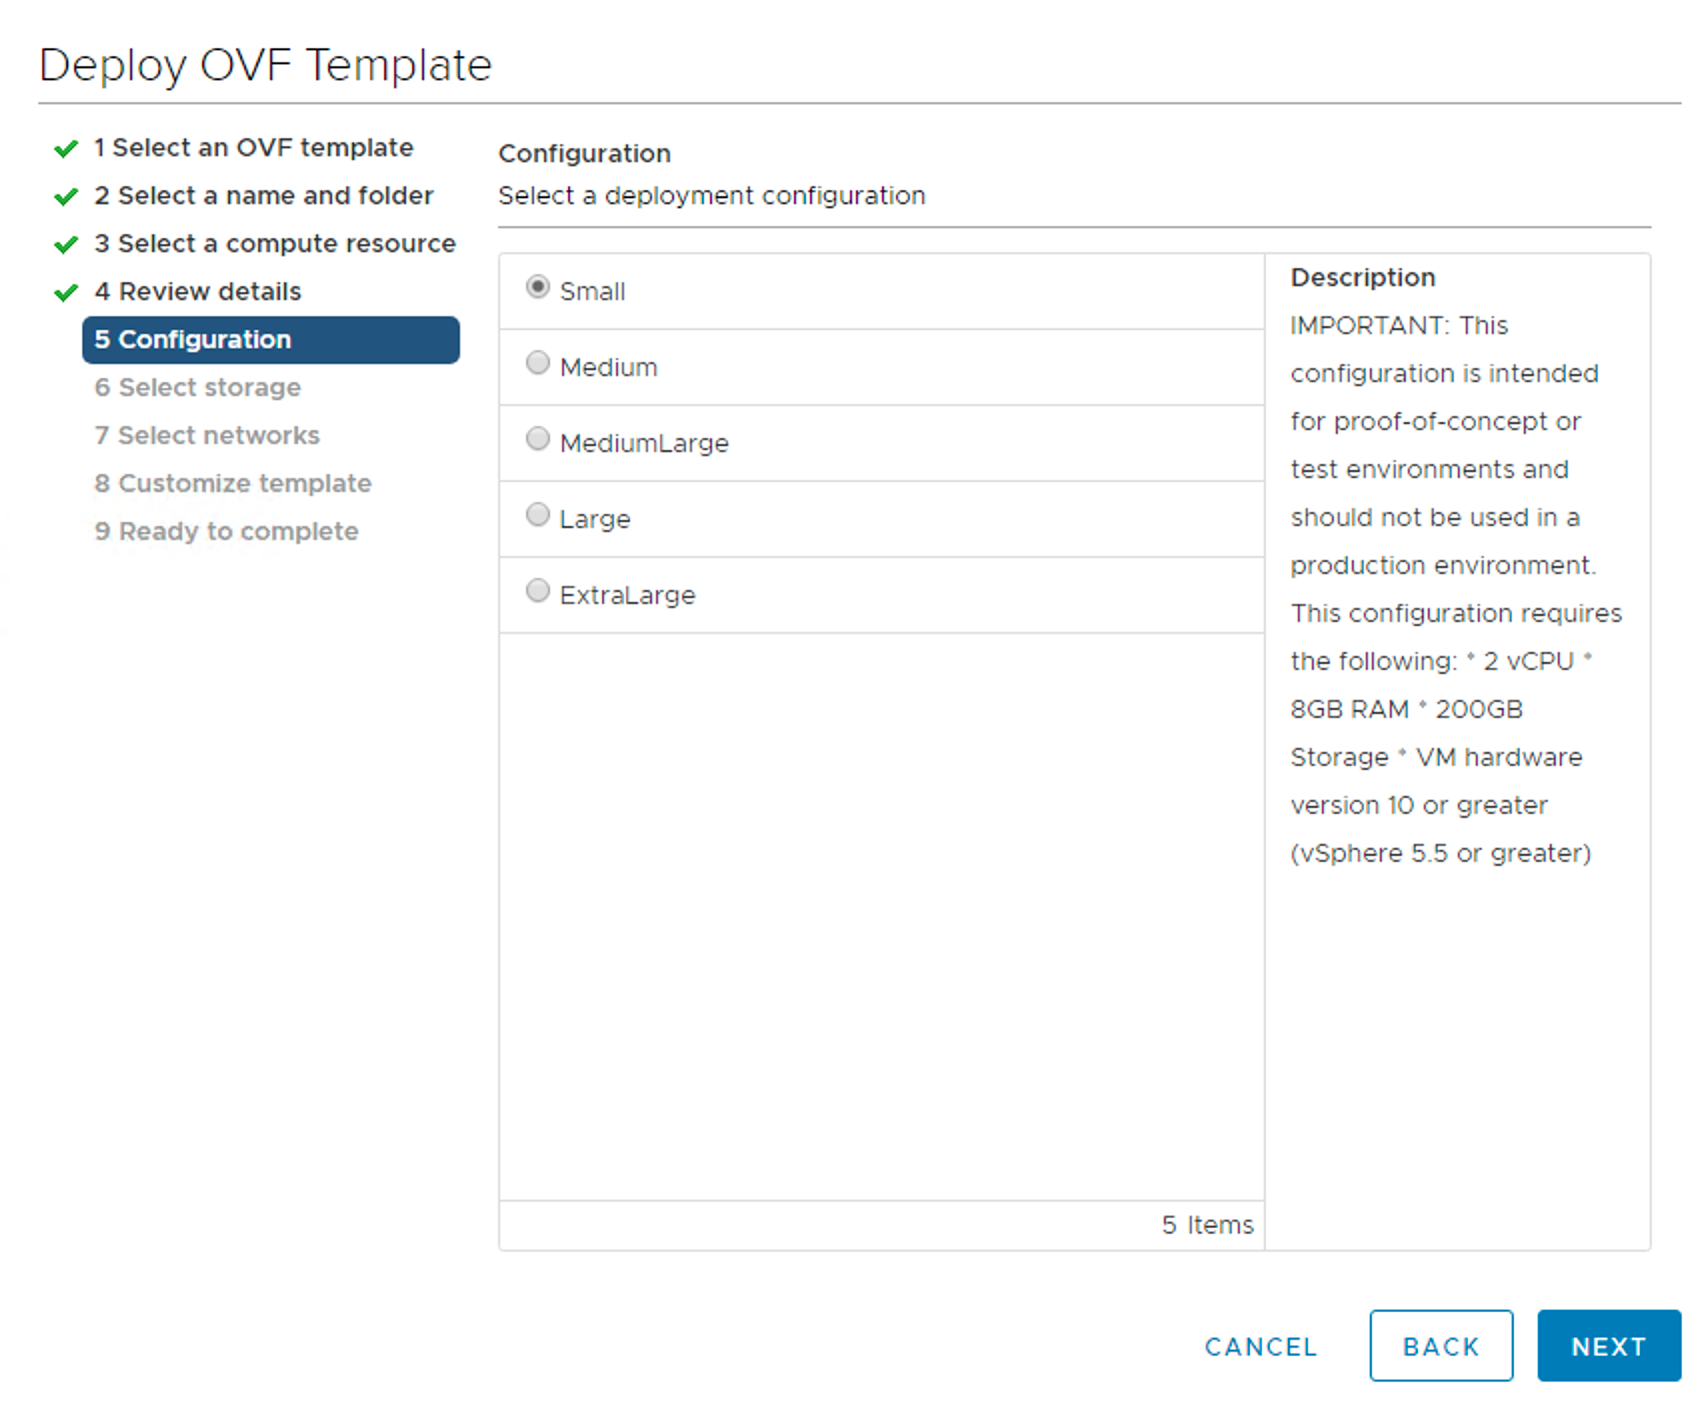
The OVA deployment is a straight forward process. I choose a small deployment configuration as this is for lab purposes:
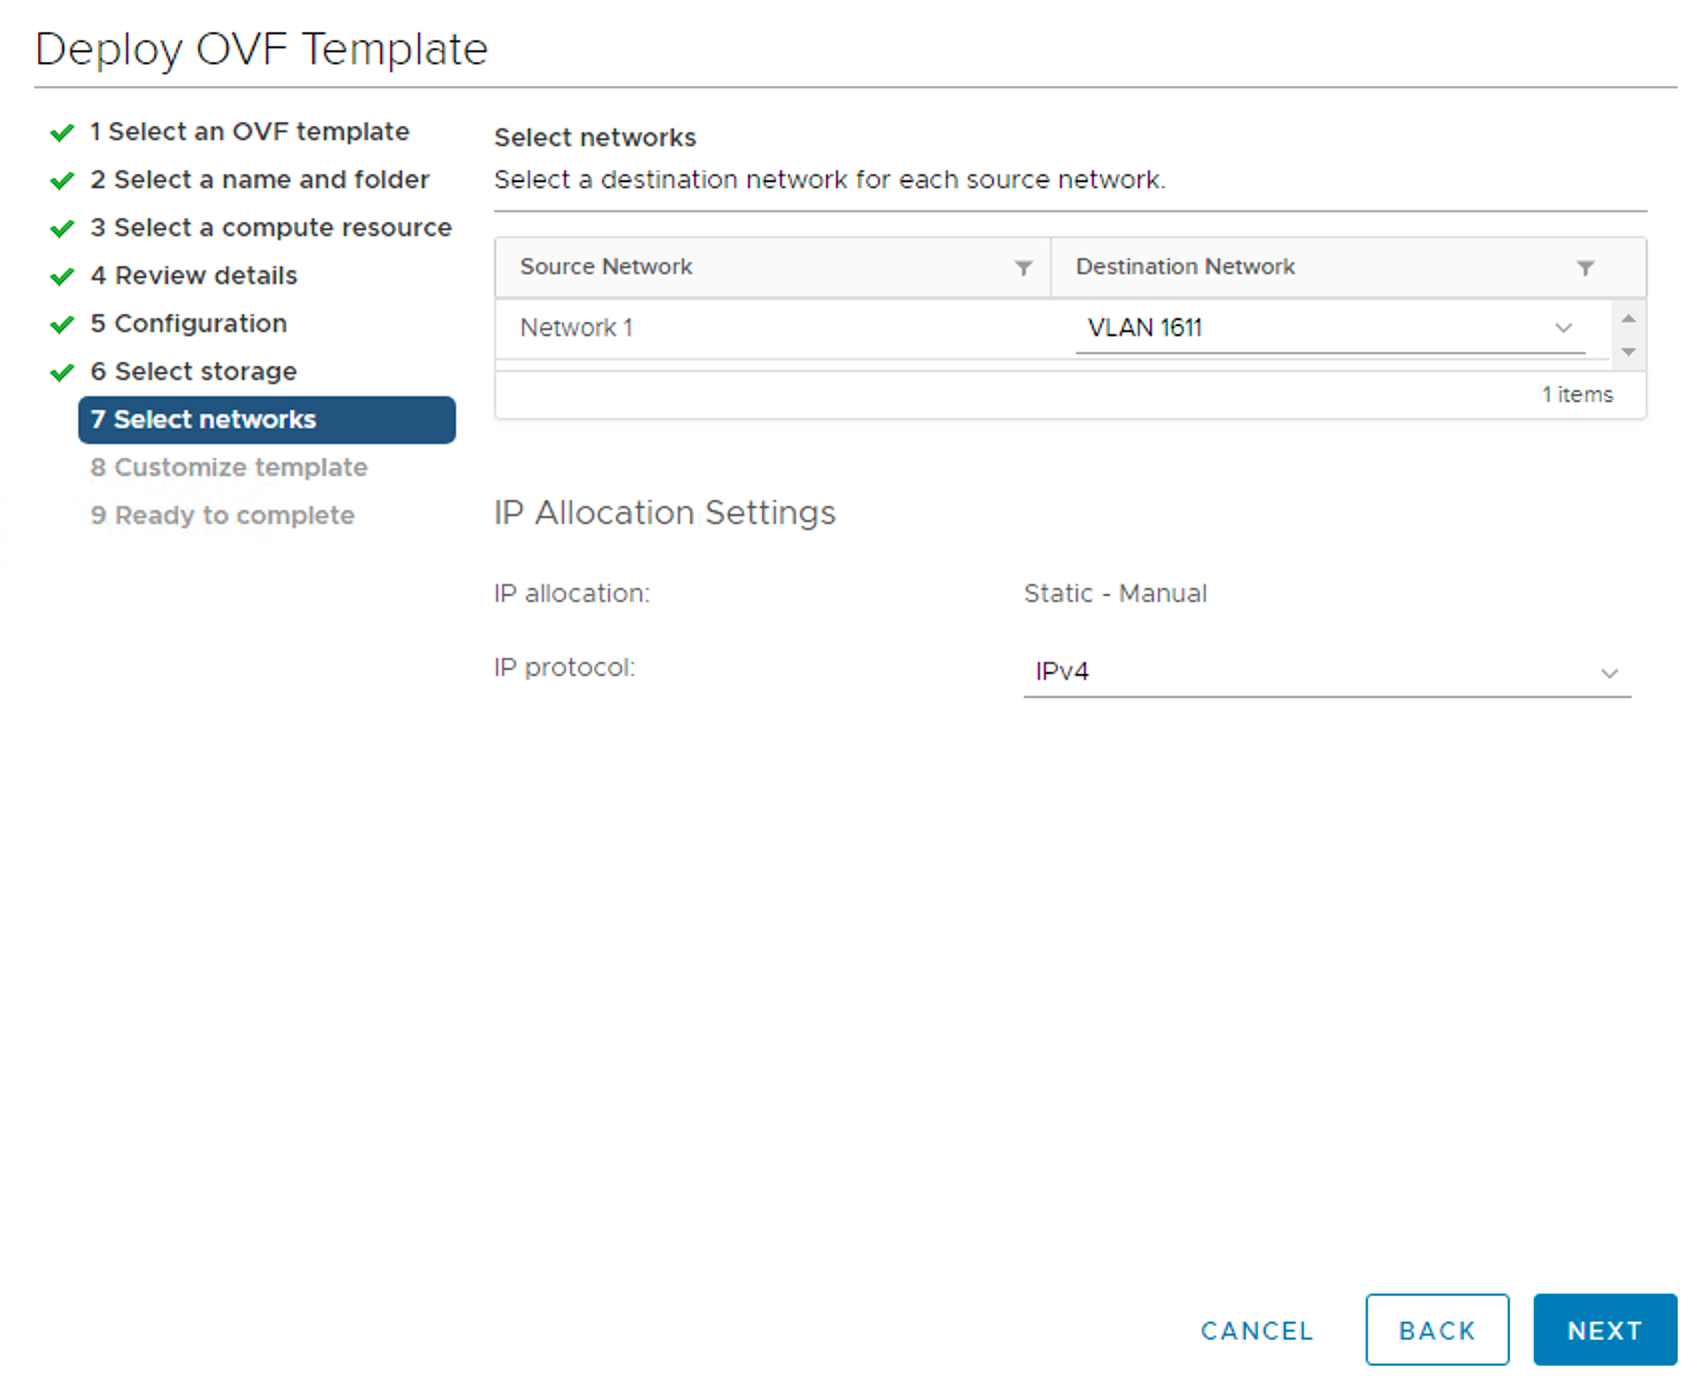
I pick the management network (VLAN 1611) as the destination network for “Network 1” and IPv4 as the protocol:
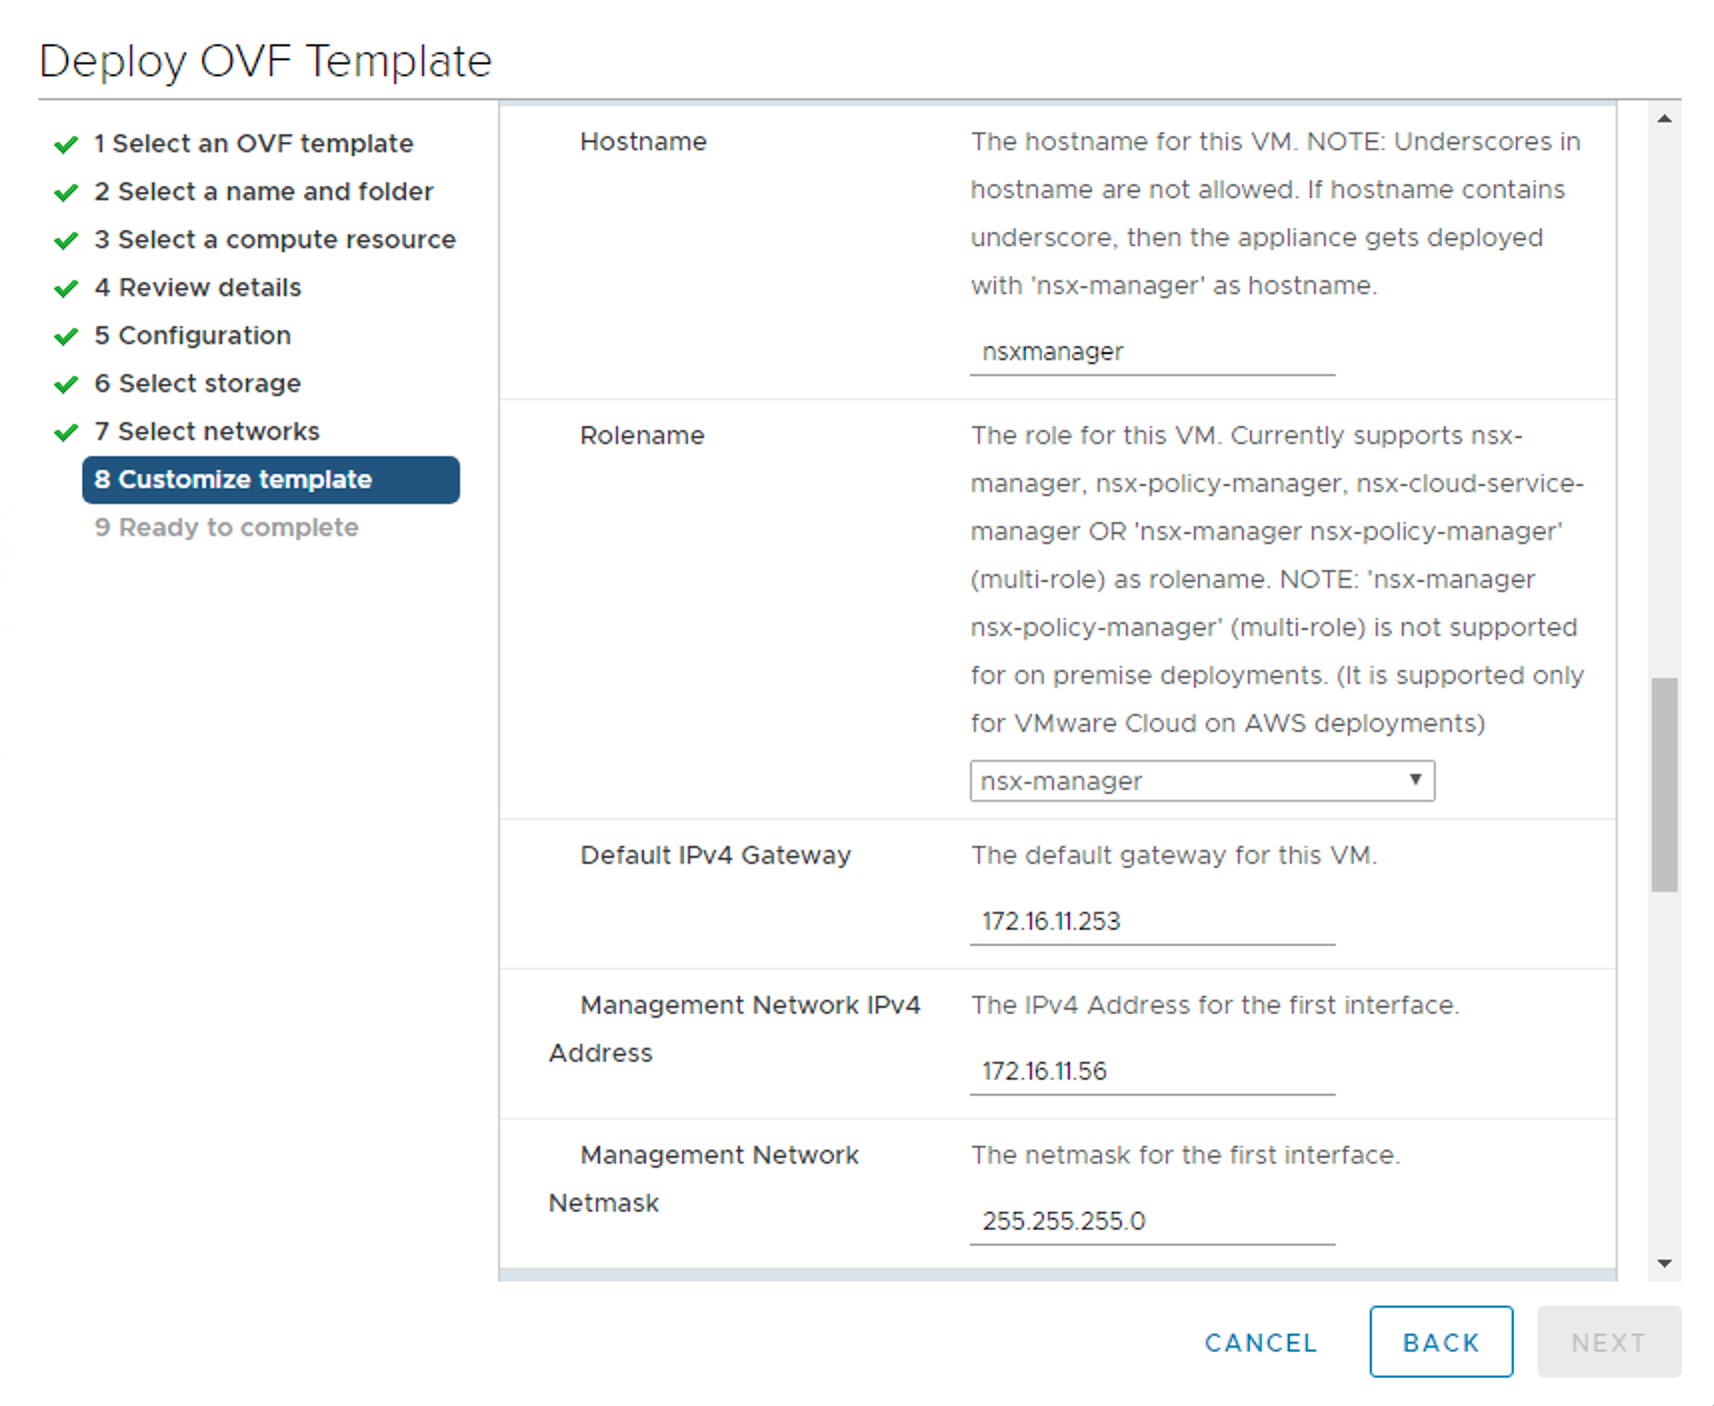
I need to fill in the required details on the “Customize template” page. I have selected”nsx-manager” as the “Rolename”.
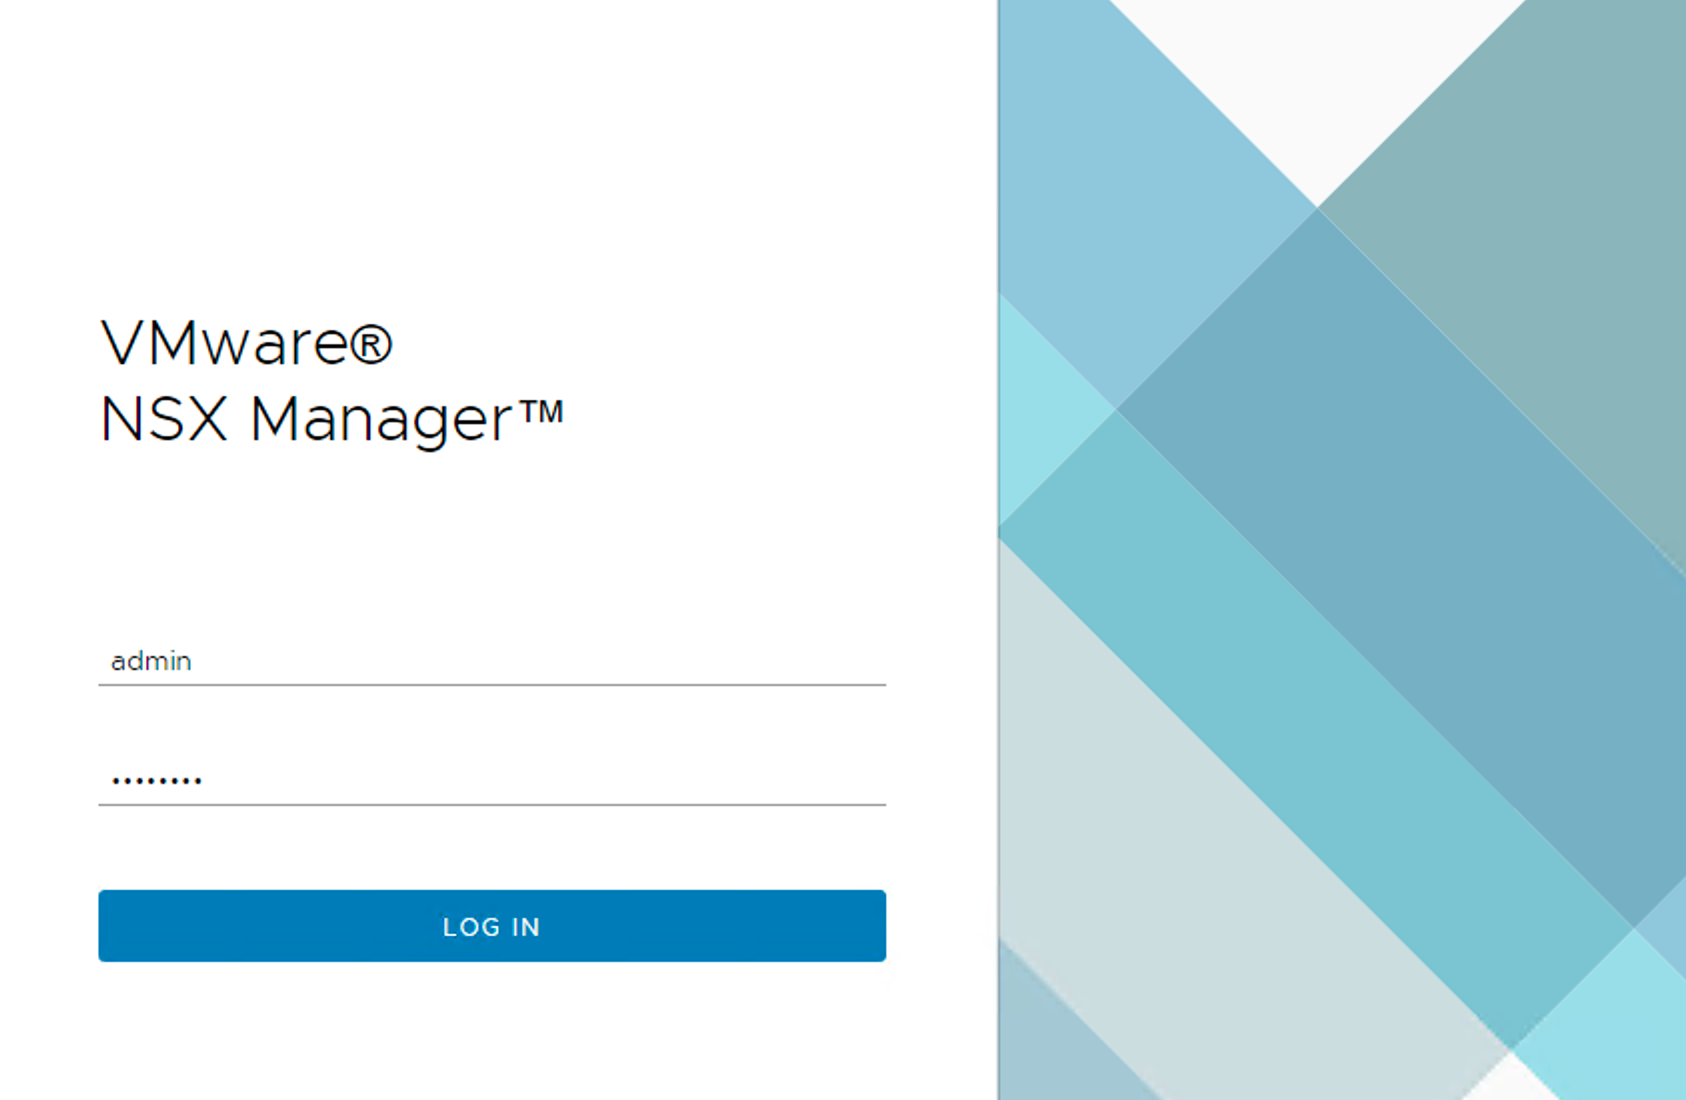
Once the virtual appliance is deployed it needs to be started. It will take some minutes to boot and get things up and running. Once ready I can log in to the NSX Manager web interface at https://nsxmanager.rainpole.local using the previously configured admin account:
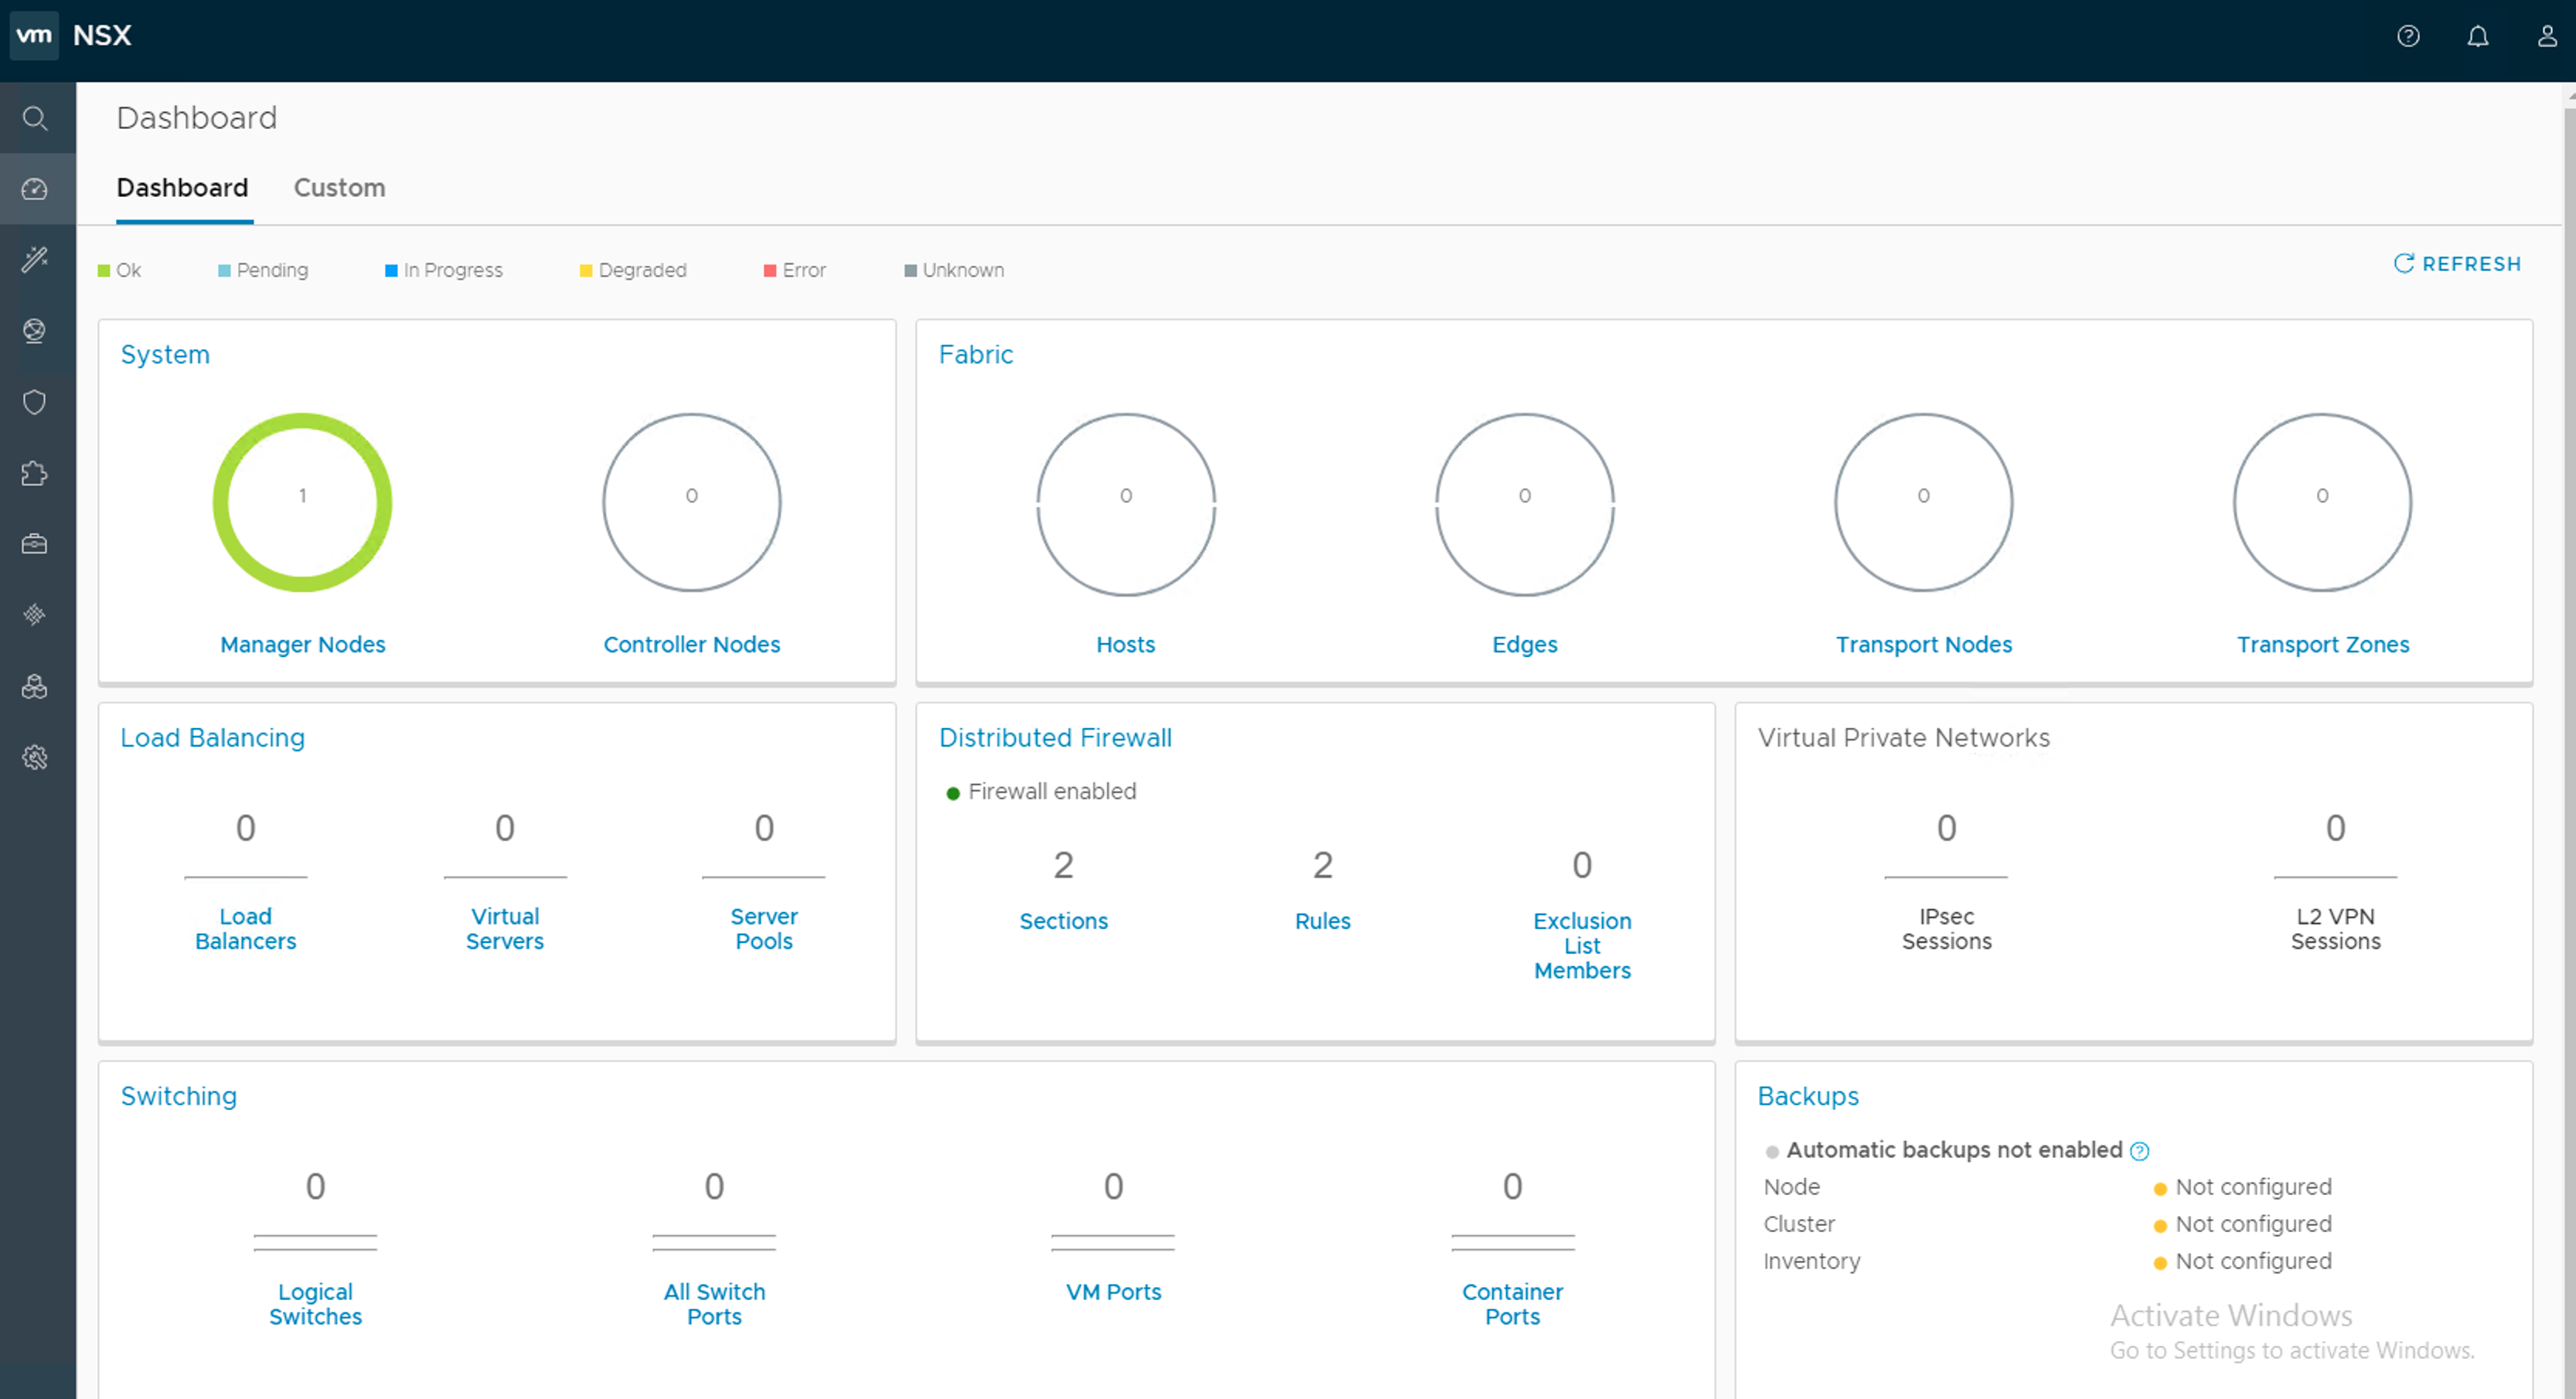
The first time I log in I need to accept the license agreement and answer the question about the CEIP program. I then end up at the “NSX Overview” page:

One thing I notice immediately is how elegant NSX Manager interface is. I really like the layout of the HTML5 interface with a menu on the left side that pops out when moving the mouse cursor over it.
I took some time to look around in the web interface just to familiarise myself. After all I’ll be spending quite some time in the web interface during the NSX-T deployment.
The dashboard shows status and health overview of of the platform and its components. It’s pretty empty right now as you see 🙂
Adding a compute manager
Although there is no relationship between NSX Manager and vCenter like there is in NSX-V, it is possible to add vCenter systems as a so called compute managers. This is not required but having this link in place makes deploying NSX-T components on vSphere more convenient.
In the menu on the left I choose “Fabric” > “Compute Manager” and click “+Add”. I fill out the details of my vCenter system and then click on the “Add” button:

After a short registration process vCenter is added to NSX Manager:

Housekeeping
Under “System” I find some items that are of interest at this point:

Two things I would probably want to have a look at straight after deploying NSX Manager in a production environment are certificates and backup.
It is under “Trust” certificates are managed. Default self-signed certificates often need to be replaced with ones that are signed by a trusted CA. This is done over here, partly. An API call is actually needed to activate a newly imported certificate.
Backup can be configured entirely in the GUI. This is done under “Utilities” > “Backup”. Here we configure scheduling/interval and backup destination:


It is here I learn that there are three types of backup:
- Cluster backup – includes the desired state of the virtual network
- Node backup – includes the NSX Manager appliance configuration
- Inventory backup – includes the set of ESX and KVM hosts and edges
Time synchronisation is important and a NTP server can be configured during the NSX Manager deployment. If I want to change the NTP configuration after deployment I need to use the NSX Manager CLI or API. Using the CLI the following command will configure “ntp.rainpole.local” as a time source:
set ntp-server ntp.rainpole.local
Likewise, if I need to (re-)configure DNS this is done via the NSX Manager CLI or API. Configuring the Windows AD/DNS server in my lab as the DNS server is done with this CLI command:
set name-servers 172.16.11.10
Conclusion
Installing and configuring NSX Manager in my lab environment was an easy process. The web interface looks really good with a nice layout. I’m a bit surprised to see that some, what I consider, basic configuration can’t be done in the GUI (NTP, DNS, logging), but I’m sure this will be added to the GUI in future releases of NSX Manager.
In the next part I’ll continue my NSX-T deployment journey and set up the control plane.

Hi, your lab diagram is labeled as “Nested”, however you are actually showing Physical ESXi hosts. I was expecting ONE Physical ESXi host nesting multiple ESXi VM hosts where you configure NSX. Did I read your topology wrong?
LikeLike
Hi Michael, this environment is completely nested and I purposely left out the details of the non-nested environment. But you are right that this is running on one physical ESXi host.
LikeLike
how much RAM for the lab ?
LikeLike