Welcome back! We’re looking at how to gain visibility at different points in the NSX-T data path.
You may remember from part one that virtual machine “app01” (172.16.2.50) is trying to ping another virtual machine called “web01” (172.16.1.53), but it’s receiving “request timeout”. We’re trying to find out where in the data path we’re having an issue.
So far we captured packets at several points in the NSX-T data path:
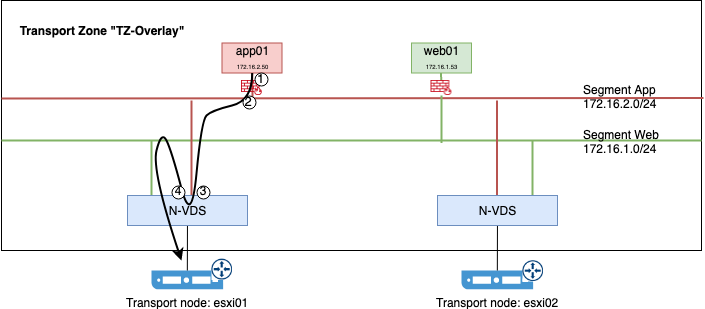
We looked at traffic pre (1) and post (2) distributed firewall. Here we actually found a small issue with a missing DFW rule. Then we ran captures before (3) and after (4) traffic got routed by the distributed logical router.
Reference points
The NSX-T control plane provided information about the location of the destination IP address. Traffic is now heading towards the physical network.
The points we’ll have a closer look at today are the N-VDS uplink and the vmnic as shown in the diagram below:
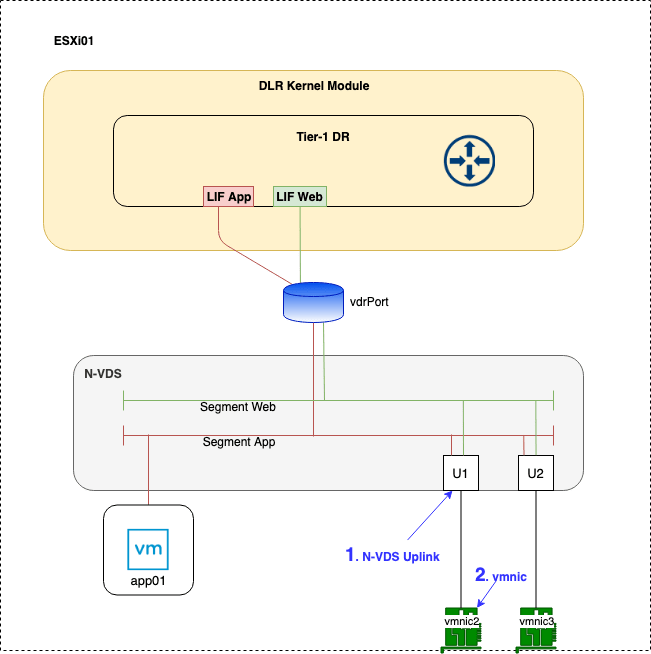
Reference point 1 – N-VDS Uplink
To see the relevant traffic at the N-VDS uplink, we run the following command:
nsxcli -c start capture interface uplink1 direction output expression dstip 172.16.1.53

As you can see the ICMP echo requests are arriving at the uplink. No issues here it seems so we’ll move on to the next point.
Reference point 2 – vmnic
So this should be easy. We’re starting a new capture by running:
nsxcli -c start capture interface vmnic2 direction output expression dstip 172.16.1.53
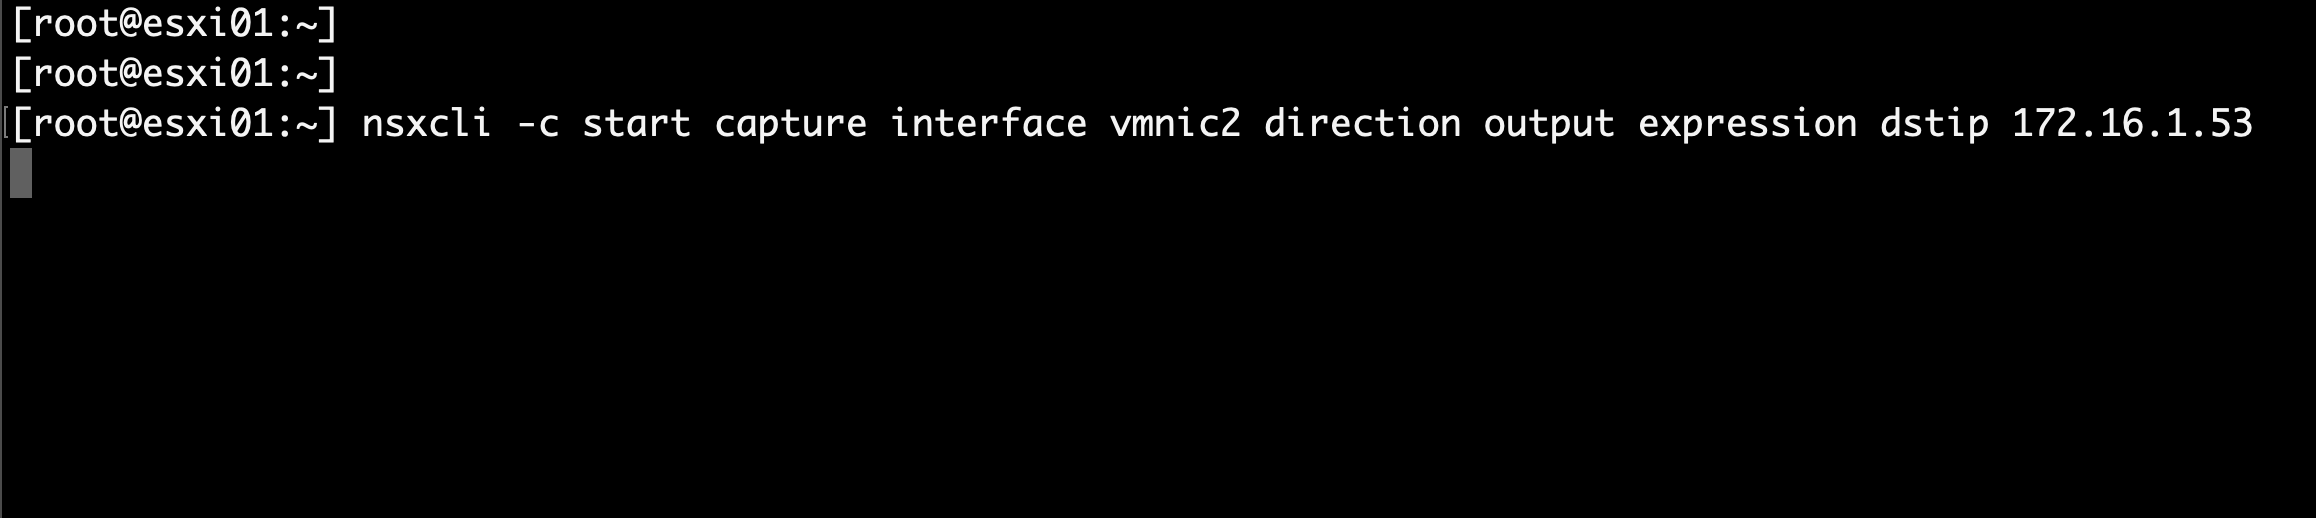
Nothing? No output? Traffic seems to have vanished between the N-VDS uplinks and the physical NICs.
Let’s see if there’s traffic on vmnic2 at all:
nsxcli -c start capture interface vmnic2 direction output
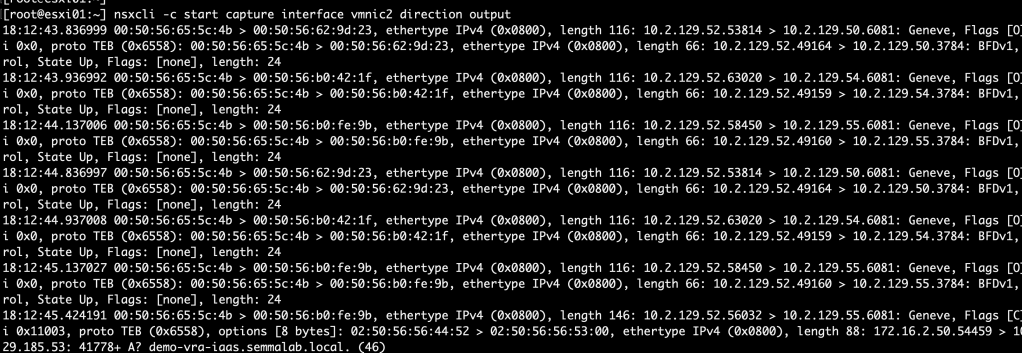
There’s plenty of traffic. So where are the ICMP packets?
Welcome to Geneve
As in Generic Network Virtualization Encapsulation that is. The protocol providing network overlay capability in NSX-T.
The Geneve protocol’s job is to set up a tunnelling mechanism between NSX-T transport nodes. Each transport node has one or more tunnel endpoints (TEPs) that encapsulate and decapsulate layer 2 frames that are originating from or destined to NSX-T logical networks.
This encapsulation/decapsulation process is running close to the physical NICs. Some server grade NICs even have capabilities to offload the TEPs.
See the VMware Compatibility Guide for supported NICs that offer Geneve offload capabilities:
So that’s all great and cool, but now the ICMP packets went down a Geneve tunnel and we lost visibility!
Nope.
Wireshark to the rescue
The good thing with Geneve is that it’s open to third party tools, like Wireshark, that can decode the encapsulated packets. Let’s have a look at that.
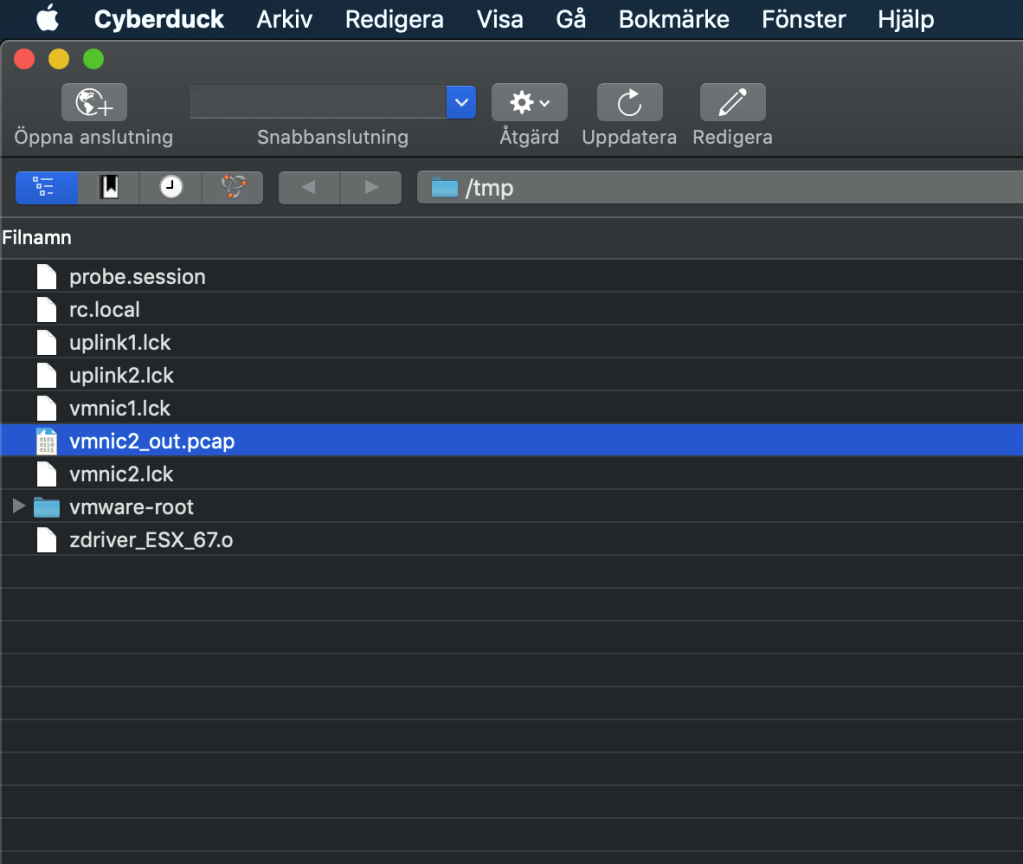
First we need to capture vmnic2’s outbound traffic once more, but this time we’re saving the output to a pcap formatted file:
nsxcli -c start capture interface vmnic2 direction output file vmnic2_out.pcap

After 30 seconds or so we terminate the capture. The pcap file can be found under /tmp on the ESXi host. Using a tool like WinSCP (Windows) or Cyberduck (MacOS) or just native scp (Linux/MacOS) we can easily copy the file to a machine with Wireshark installed.
Let’s open this file in Wireshark and have a look:

Yes, a bunch of packets, but we want to find the ICMP packets. Could it be as easy as typing “ip.dst == 172.16.1.53” as the display filter?

Yes, it is that easy! Wireshark decoded the Geneve packets and we can query on the attributes of the encapsulated packets.
A closer look at the one of these captured frames:

Wireshark makes it quite easy to understand the Geneve frame’s structure. Below the Geneve header we have the entire encapsulated ICMP packet originating from the NSX-T logical network (segment “App”). Pretty nice!
We could also use the tcpdump-uw command on the ESXi host to look at the contents of a pcap file, but I prefer to use Wireshark with its excellent Geneve decoder for a more user friendly experience.
Conclusion
For a moment I thought we had lost visibility into the NSX-T data path. It turned out that the ICMP packets were being encapsulated. The encapsulation does mean some additional steps for detailed visibility, but all in all it’s a pretty quick process.
In the next part we’ll continue the journey down the NSX-T data path as traffic arrives at the destination ESXi host. Hopefully I’ll find out why the virtual machine isn’t receiving ICMP replies in the process.

Leave a comment