Welcome back! Today we continue our NSX-T Multisite adventure. Let’s begin with a short recap of what we did in part 1.
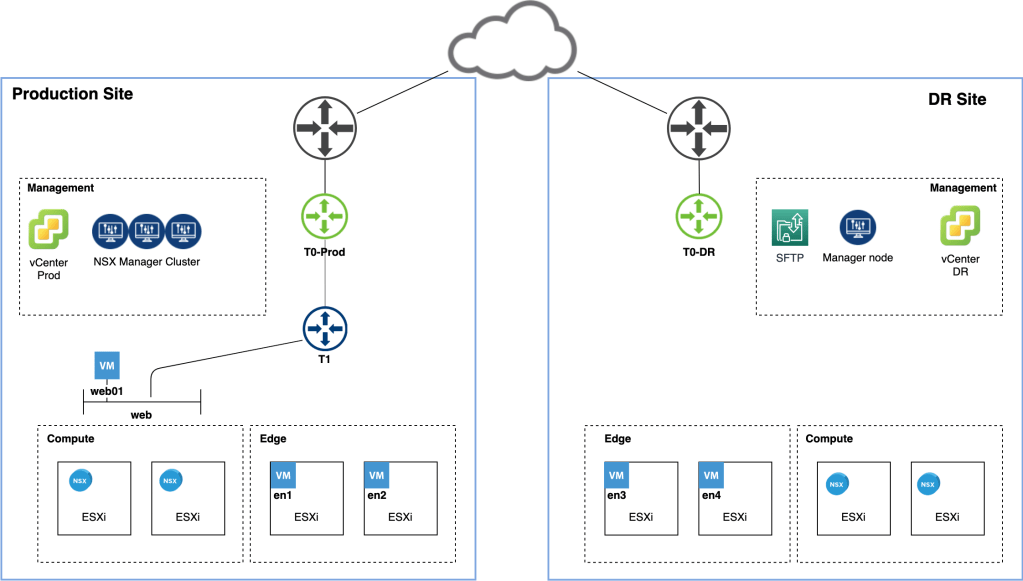
We started off in an environment with a production site and a partially deployed disaster recovery site. Tasked with configuring the NSX-T 2.5.1 implementation for the new multisite environment, we took the following steps:
- Enabled DNS based access for transport nodes.
- Moved the SFTP NSX-T backup target to the DR site.
- Deployed a standalone NSX Manager node at the DR site.
- Added the DR site’s vCenter instance as a compute manager to NSX Manager.
- Configured NSX-T transport nodes at the DR site.
- Set up a Tier-0 Gateway at the DR site.
This resulted in a fully incorporated DR site from an NSX-T perspective:
Life is good. If only things could stay like this forever…
Disaster!
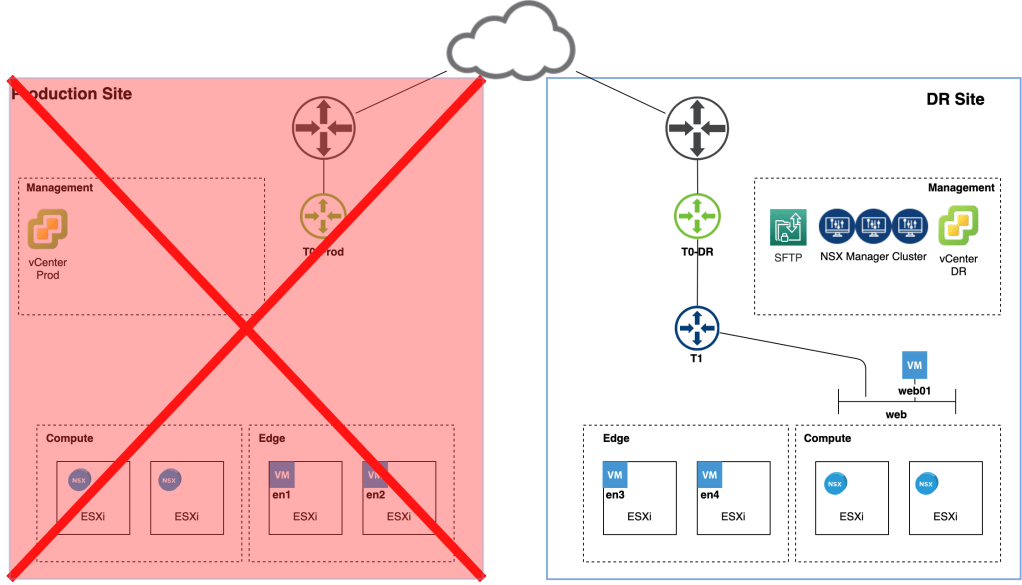
We knew this was going to happen sooner or later. The production site just experienced a complete meltdown and isn’t coming back online any time soon:
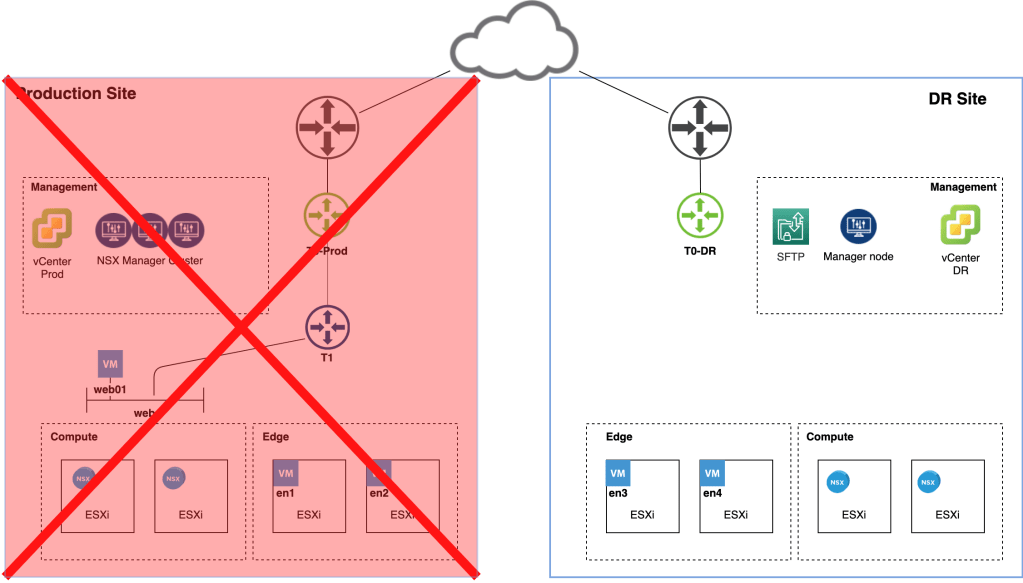
We need to perform a fail over to the DR site and we have about an hour to get this done. No time to waste!
DNS
The first thing we need to do is update the DNS records for the NSX Manager nodes with IP addresses that are part of the DR site’s management network:
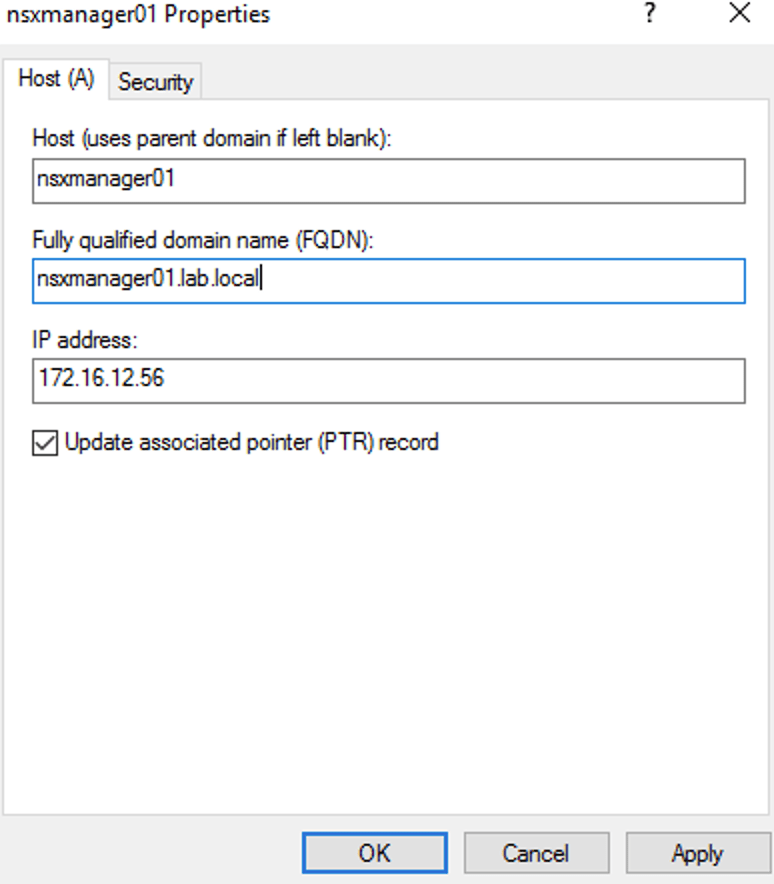
In our scenario the following four records need to be updated:
| nsxmanager.lab.local | NSX Manager cluster VIP |
| nsxmanager01.lab.local | First manager node (already deployed at the DR site) |
| nsxmanager02.lab.local | Second manager node |
| nsxmanager03.lab.local | Third manager node |
Enable FQDN
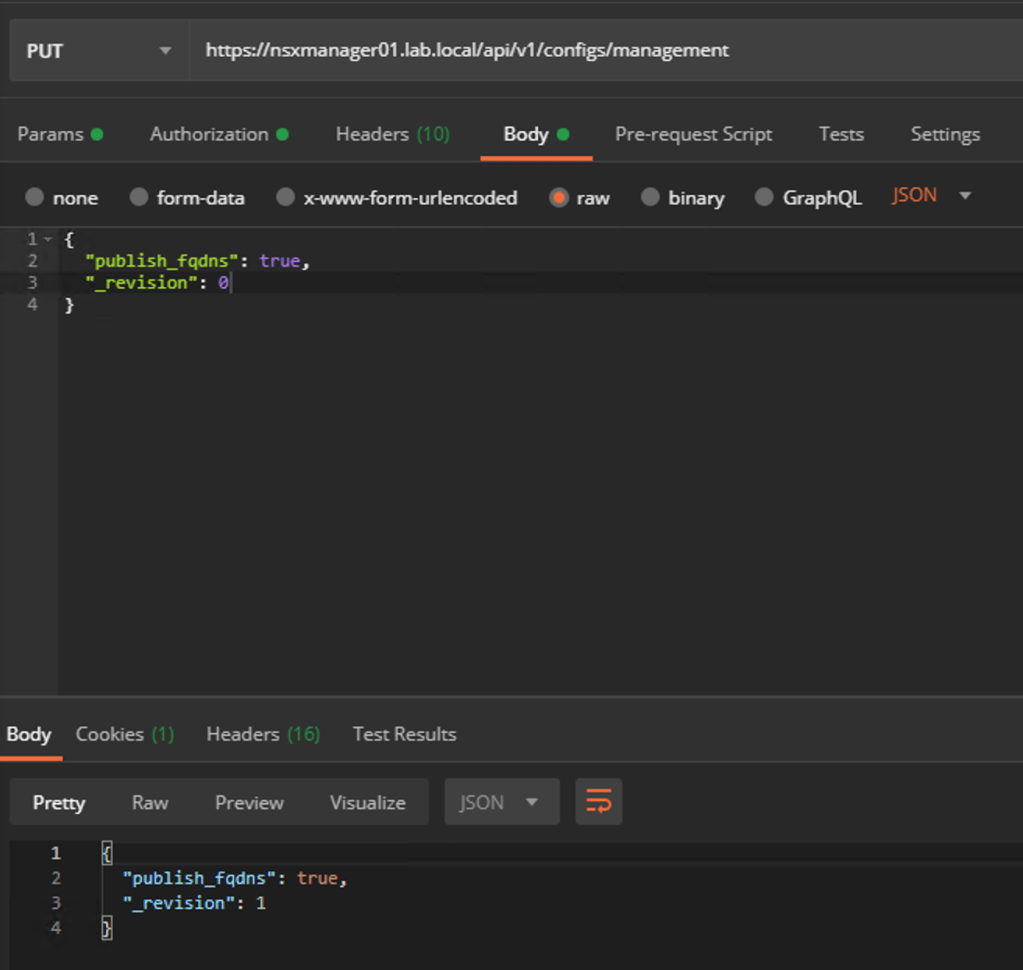
Before we can restore an NSX backup we need to enable FQDN on the single NSX Manager node at the DR site. Without FQDN enabled the node won’t recognize the backup files on the SFTP backup target.
Issue the following API call to enable FQDN on the manager node:
PUT https://<nsx-mgr>/api/v1/configs/management
The request body should contain the following JSON code:
{
  "publish_fqdns": true,
  "_revision": 0
}
Management/Control plane restore
With updated DNS records and FQDN enabled we can start the restore of the NSX Manager cluster.
We log in to the manager node and navigate to System > Lifecycle Management > Backup & Restore > Restore:

We choose the most recent backup and click the Restore button to start the process.
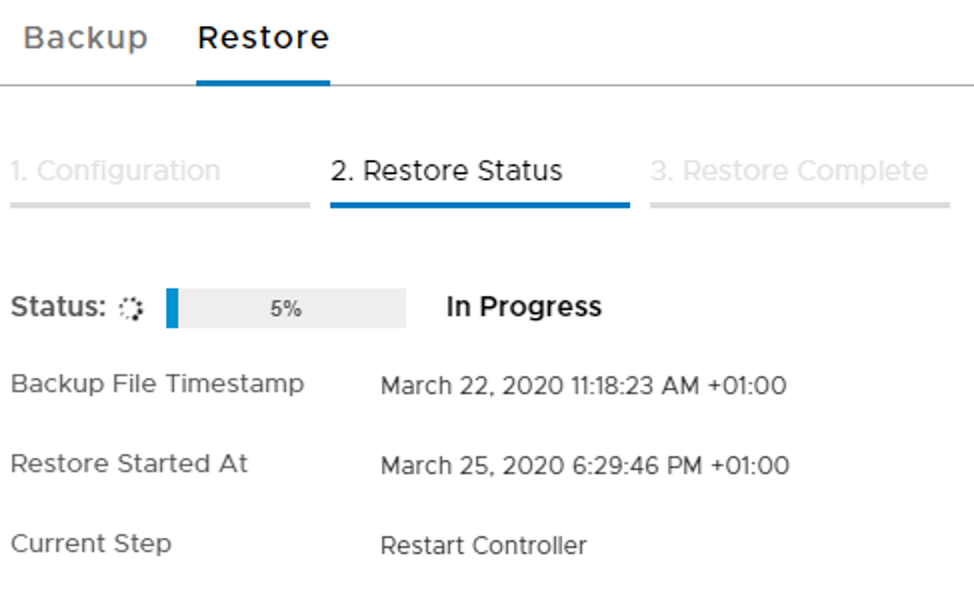
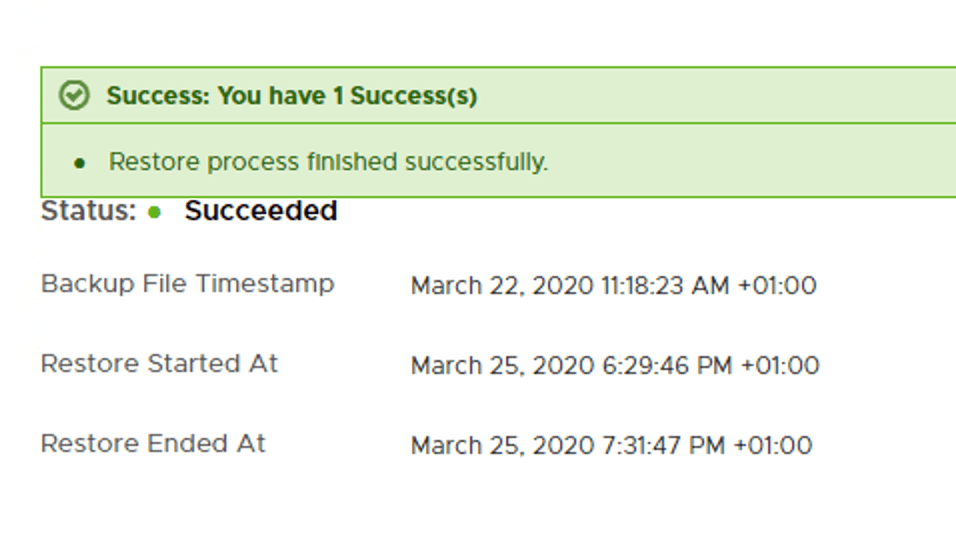
Restoring might take a while and hopefully ends with this message:
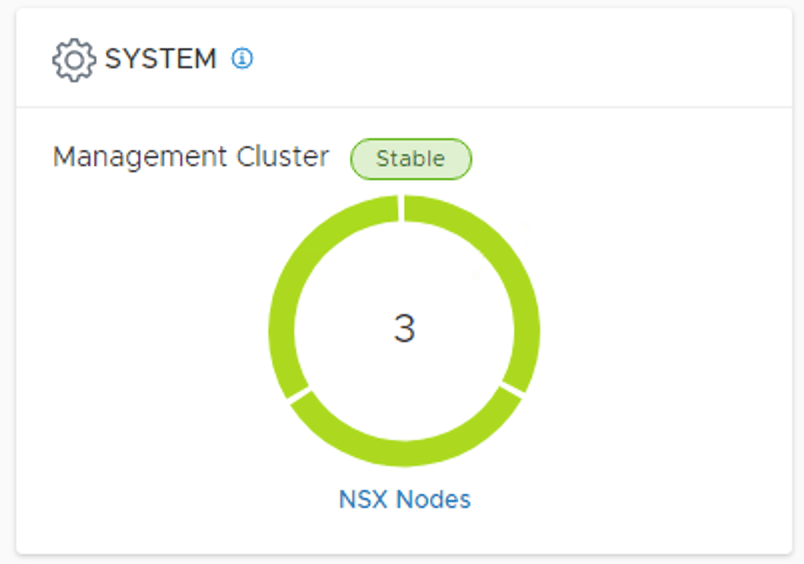
During the restore process we deploy two additional manager nodes which means we now have a production grade NSX Manager cluster at the DR site:
Verify transport node connectivity
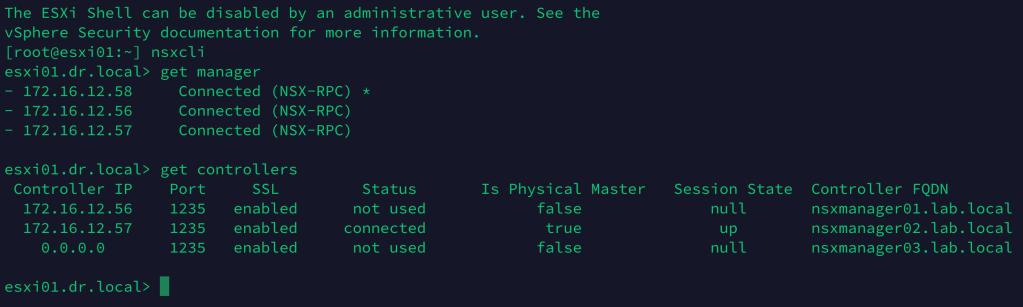
To verify connectivity between the transport nodes and the manager/control nodes, we can run the get managers and the get controllers NSXCLI commands from any of the transport nodes:
Data plane restore
Now that the central management/control plane is up and running again we can focus on recovery of the data plane. Let’s first have a quick look at the current situation:

The DR site is missing an important piece of logical network: The Tier-1 Gateway.
Luckily, this is software defined networking and we’ll resolve this issue both swiftly and elegantly. Our weapons of choice are UI, API, or script. For reasons of clarity we will use the UI here.
In the NSX Manager UI we navigate to Networking > Connectivity > Tier-1 Gateways and edit the Tier-1 Gateway object:
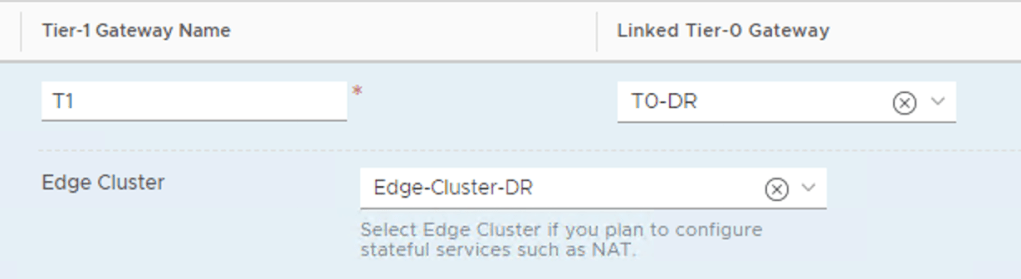
Here we simply change the Linked Tier-0 Gateway to the Tier-0 of the DR site and the Edge Cluster to the Edge Cluster running at the DR site. Click Save to activate the changes.
Automation
If we would like to automate this Tier-1 reconfiguration, as part of some DR orchestration for example, we can basically use any method we like as long as it can interact with the NSX-T REST API.
From the VMware NSBU comes a PowerShell script written by Dale Coghlan (thanks also to Dimitri Desmidt). You can get it over here. I won’t go into the details of this script, but if we were to use it in our DR scenario the syntax looks something like this:
.\t1-move-policy.ps1 -NsxManager nsxmanager.lab.local -username admin -Password VMware1!VMware1! -SrcTier0 T0-Prod DstTier0 T0-DR DstEdgeCluster Edge-Cluster-DR -Tag Reallocate -Scope DR
Other options for automating would be REST API calls or tools like Terraform or Ansible.
Compute?
Well, compute was taken care of by the Site Recovery Manager team. We were quite busy restoring that NSX platform after all.
Workloads have been recovered at the DR site as this final picture shows:
Summary
This completes our NSX-T Multisite exercise. It’s been quite a journey. Let’s have a look at the run book for this NSX-T Multisite DR scenario:
Preparation phase
- Enable FQDN on the NSX Manager cluster.
- Place the SFTP backup target on the DR site.
- Deploy a standalone NSX Manager node at the DR site.
- Add the DR site’s vCenter instance as a compute manager.
- Configure/deploy NSX-T transport nodes at the DR site.
- Configure a Tier-0 Gateway at the DR site.
Disaster Recovery phase
- Update DNS records
- Enable FQDN on the standalone NSX Manager node
- Restore NSX Manager backup and 3-node cluster
- Reconfigure the Tier-1
Quite a checklist you might say. There are indeed some additional moving parts in this particular scenario. On the other hand, the non-disruptive preparations are done just once and a full NSX-T site recovery takes less than an hour. It’s not so bad.
I hope you learned something new and useful. I know I did. Thanks for reading.
References:
– NSX-T 2.5 Multisite document (Jerome Catrouillet, Dimitri Desmidt)

Leave a comment