
Until recently I always used pfSense with the OpenBGPD package as the NSX-T Edge counterpart in my lab environment. It’s quick and easy to set up and works well enough. But pfSense is not what I typically find in a customer’s production environment.
I started to investigate other virtualized “top-of-rack solutions” for the lab that would be a bit more similar to what I see in the enterprise. Right now I’m testing out FRRouting and I must say that I’m pretty impressed with this solution so far. At least it’s good enough to be the subject of a blog post or two 😉
I’m going to walk through deploying and configuring a pair of FRRouting instances, the NSX-T Edge, and BGP routing in a lab environment. Follow along if you want.
Target topology
The diagram below shows a logical L3 design for the NSX-T Edge – FRRouting solution that we’ll be building:

There’s nothing much out of the ordinary here. We have a Tier-0 gateway backed by two Edge nodes, and BGP routing. At the top of the diagram things look a bit less familiar with two Linux routers powered by FRRouting.
That’s a nice sketch. Now let’s see if we can make it work too.
Bill of materials
The following software is used to build this environment:
- NSX-T 2.5.1
- vSphere 6.7 U3
- Debian Linux 10.2
- FRRouting 7.2
Deploy FRRouting
This first part is about getting the FRR instances up and running which begins with installing two Linux servers. Let’s get right to it.
Install Linux servers
Debian Linux is a good fit here as there is an official FRR Debian repository which makes installing FRR a lot easier.

Each server is configured with two NICs.
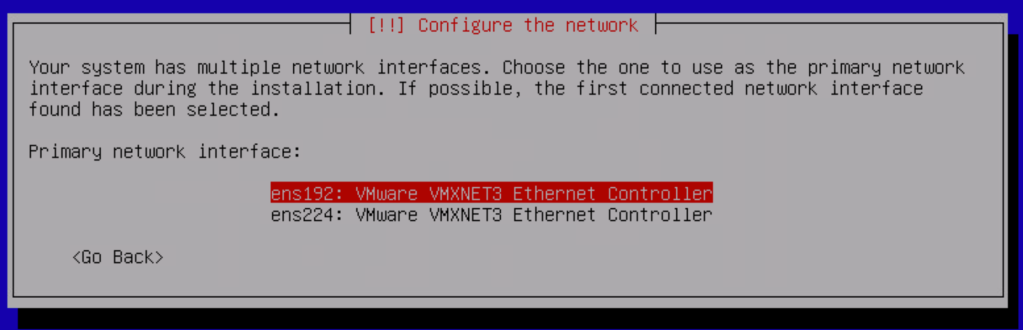
The ens192 interface is configured as the primary interface and will be the “north-facing” port. The ens224 interface is the “SDDC-facing” port.
At this point we only assign a static IP address to the ens192 interface.
The only additional components we need to install are the SSH server and standard system utilities:
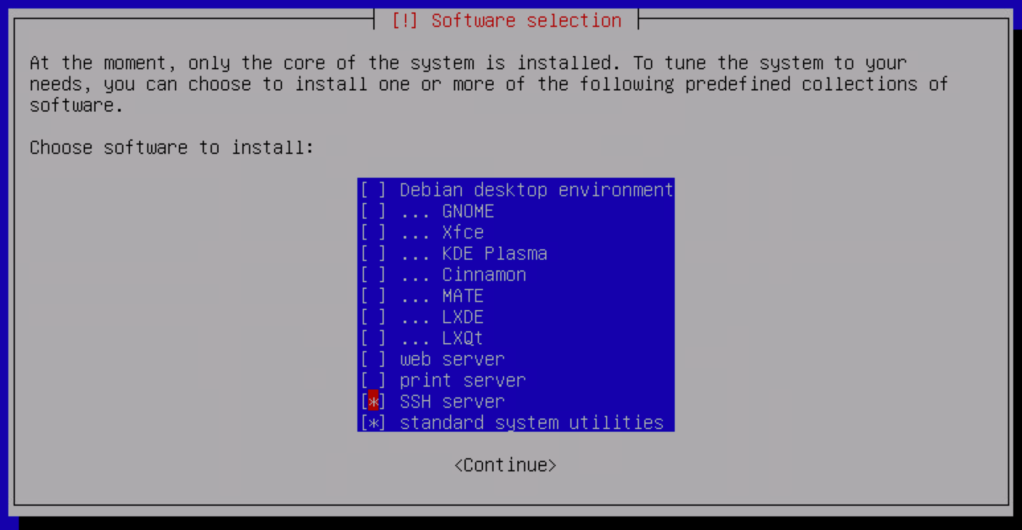
Complete the Debian installation on both servers.

Install VLAN support
The servers will soon be configured with some VLAN interfaces. To add support for this we install the VLAN package:
apt install vlan -y
Add the following line to /etc/modules so that VLAN (802.1Q) support is loaded during boot:
8021q
Enable IPv4 packet forwarding
We want the Linux servers to become Linux routers and as a part of that we need to enable IPv4 packet forwarding in /etc/sysctl.conf:
net.ipv4.ip_forward=1
Reboot the servers after making this change.
Configure network interfaces
Time to configure the network interfaces on the Linux routers. The following shows the interface configuration per Linux router:
frr-01:
| Interface | IP address | Comment |
|---|---|---|
| ens192 | 10.2.129.101/24 | Primary interface, north-facing |
| ens224 | – | Secondary interface, SDDC-facing |
| ens224.1611 | 172.16.11.253/24 | Management VLAN |
| ens224.1657 | 172.16.57.1/29 | BGP peering VLAN |
| ens224.1659 | 172.16.59.253/24 | Overlay transport VLAN |
Which results in the following /etc/network/interfaces for frr-01:
source /etc/network/interfaces.d/*

# The loopback network interface
auto lo
iface lo inet loopback

# The primary network interface - north-facing port
auto ens192
allow-hotplug ens192
iface ens192 inet static
address 10.2.129.101/24
gateway 10.2.129.1
dns-nameservers 10.2.129.10
dns-search demo.local

# The secondary network interface - SDDC-facing port
auto ens224
allow-hotplug ens224
iface ens224 inet manual
mtu 9000

# The VLAN 1611 interface - Management
auto ens224.1611
iface ens224.1611 inet static
address 172.16.11.253/24

# The VLAN 1657 interface - BGP peering
auto ens224.1657
iface ens224.1657 inet static
address 172.16.57.1/29

# The VLAN 1659 interface - Overlay transport
auto ens224.1659
iface ens224.1659 inet static
address 172.16.59.253/24
frr-02:
| Interface | IP address | Comment |
|---|---|---|
| ens192 | 10.2.129.102/24 | Primary interface, north-facing |
| ens224 | – | Secondary interface, SDDC-facing |
| ens224.1611 | 172.16.11.254/24 | Management VLAN |
| ens224.1658 | 172.16.58.1/29 | BGP peering VLAN |
| ens224.1659 | 172.16.59.254/24 | Overlay transport VLAN |
The corresponding /etc/network/interfaces for frr-02:
source /etc/network/interfaces.d/*

# The loopback network interface
auto lo
iface lo inet loopback

# The primary network interface - north-facing
auto ens192
allow-hotplug ens192
iface ens192 inet static
address 10.2.129.102/24
gateway 10.2.129.1
dns-nameservers 10.2.129.10
dns-search demo.local

# The secondary network interface - SDDC-facing
auto ens224
allow-hotplug ens224
iface ens224 inet manual
mtu 9000

# The VLAN 1611 interface - Management
auto ens224.1611
iface ens224.1611 inet static
address 172.16.11.254/24

# The VLAN 1658 interface - BGP peering
auto ens224.1658
iface ens224.1658 inet static
address 172.16.58.1/29

# The VLAN 1659 interface - Overlay transport
auto ens224.1659
iface ens224.1659 inet static
address 172.16.59.254/24
Restart the network to activate the new network interface configuration:
systemctl restart networking
Run the ip address command to verify that the new interface configuration is active:

Install VRRP
As you noticed we are “stretching” the management VLAN (1611) and the overlay transport VLAN (1659) between the Linux routers. Both routers can act as the default gateway for these VLANs at any given time. To make use of this capability we’ll set up VRRP with Keepalived.
Install the package:
apt install keepalived -y
Create the Keepalived configuration file: /etc/keepalived/keepalived.conf. Below the Keepalived configuration per server:
frr-01 (VRRP master):
global_defs {
# Email Alert Configuration
notification_email {
# Email To Address
admin@demo.local
}
# Email From Address
notification_email_from noreply@demo.local
# SMTP Server Address / IP
smtp_server 127.0.0.1
# SMTP Timeout Configuration
smtp_connect_timeout 60
router_id frr-01
}

vrrp_sync_group VG1 {
group {
1611
1659
}
}

vrrp_instance 1611 {
# State = Master or Backup
state MASTER
# Interface ID for VRRP to run on
interface ens224.1611
# VRRP Router ID
virtual_router_id 10
# Highest Priority Wins
priority 250
# VRRP Advert Intaval 1 Second
advert_int 1
# Basic Inter Router VRRP Authentication
authentication {
auth_type PASS
auth_pass VMware1!VMware1!
}
# VRRP Virtual IP Address Config
virtual_ipaddress {
172.16.11.1/24 dev ens224.1611
}
}

vrrp_instance 1659 {
# State = Master or Backup
state MASTER
# Interface ID for VRRP to run on
interface ens224.1659
# VRRP Router ID
virtual_router_id 11
# Highest Priority Wins
priority 250
# VRRP Advert Intaval 1 Second
advert_int 1
# Basic Inter Router VRRP Authentication
authentication {
auth_type PASS
auth_pass VMware1!VMware1!
}
# VRRP Virtual IP Address Config
virtual_ipaddress {
172.16.59.1/24 dev ens224.1659
}
}
frr-02 (VRRP backup):
global_defs {
# Email Alert Configuration
notification_email {
# Email To Address
admin@demo.local
}
# Email From Address
notification_email_from noreply@demo.local
# SMTP Server Address / IP
smtp_server 127.0.0.1
# SMTP Timeout Configuration
smtp_connect_timeout 60
router_id frr-02
}

vrrp_sync_group VG1 {
group {
1611
1659
}
}

vrrp_instance 1611 {
# State = Master or Backup
state BACKUP
# Interface ID for VRRP to run on
interface ens224.1611
# VRRP Router ID
virtual_router_id 10
# Highest Priority Wins
priority 150
# VRRP Advert Intaval 1 Second
advert_int 1
# Basic Inter Router VRRP Authentication
authentication {
auth_type PASS
auth_pass VMware1!VMware1!
}
# VRRP Virtual IP Address Config
virtual_ipaddress {
172.16.11.1/24 dev ens224.1611
}
}

vrrp_instance 1659 {
# State = Master or Backup
state BACKUP
# Interface ID for VRRP to run on
interface ens224.1659
# VRRP Router ID
virtual_router_id 11
# Highest Priority Wins
priority 150
# VRRP Advert Intaval 1 Second
advert_int 1
# Basic Inter Router VRRP Authentication
authentication {
auth_type PASS
auth_pass VMware1!VMware1!
}
# VRRP Virtual IP Address Config
virtual_ipaddress {
172.16.59.1/24 dev ens224.1659
}
}
Restart the Keepalived service on both routers to activate the new configuration:
systemctl restart keepalived
We can now verify VRRP operation by running systemctl status keepalived:

Running the ip address command will hopefully show the virtual IP address on the two VLAN interfaces:

And a ping to the virtual IP address from the VRRP backup node (frr-02 in this case) should be successful:

Install FRRouting
With Linux installed and configured we continue with the FRRouting installation.
Begin by adding the FRR Debian repository:
curl -s https://deb.frrouting.org/frr/keys.asc | apt-key add -
FRRVER="frr-stable"
echo deb https://deb.frrouting.org/frr $(lsb_release -s -c) $FRRVER | tee -a /etc/apt/sources.list.d/frr.list
apt update && apt install frr frr-pythontools -y
FRRouting is now installed.
Configure FRRouting capabilities
We only enable the routing protocols that are needed. To make FRR a good match for the NSX-T Edge we would like the instances to be capable of doing BGP and BFD. So we simply enable these daemons in /etc/frr/daemons.
bgpd=yes
bfdd=yes

Restart the FRR service and verify that the BGP and BFD daemons are active:
systemctl restart frr
systemctl status frr

This is looking good. The FRR instances are now ready for control plane configuration.
Summary
This completes part 1 of the series on NSX-T and FRRouting. We’ve been quite productive:
- Installed two Debian Linux servers
- Installed VLAN support
- Enabled packet forwarding
- Configured network interfaces
- Installed and configured VRRP
- Installed FRRouting
In the next part we’ll continue with deploying the NSX-T Edge and setting up BGP routing between NSX-T and the FRR instances. Thanks for reading and stay tuned!

nice article
LikeLike
Nice article, thanks for sharing.
I was trying to set BGP peering between NSXT edge and physical OPNSense router with FRR plugin.
I almost gave up due to my limited understanding of FRR but your article gave me good overview of NSX-T with FRR and vtysh.
Cheers !!
LikeLike
Hi and thank you. Nice to know this helped you.
Cheers!
LikeLike
Hi Rutger ,
I am not be able to ping the edge interfaces from debian vms ..
I have followed the same setup you did .
Do I need to put the edge interface on trunk port group ?
What the problem could be ?
Thanks
Basem
LikeLike